To avoid any confusion the first thing I want yo say is that this MOC is old, it passed away many years ago.
I desing this MOC to enter in a competition organized by a store in Madrid in March 2010.
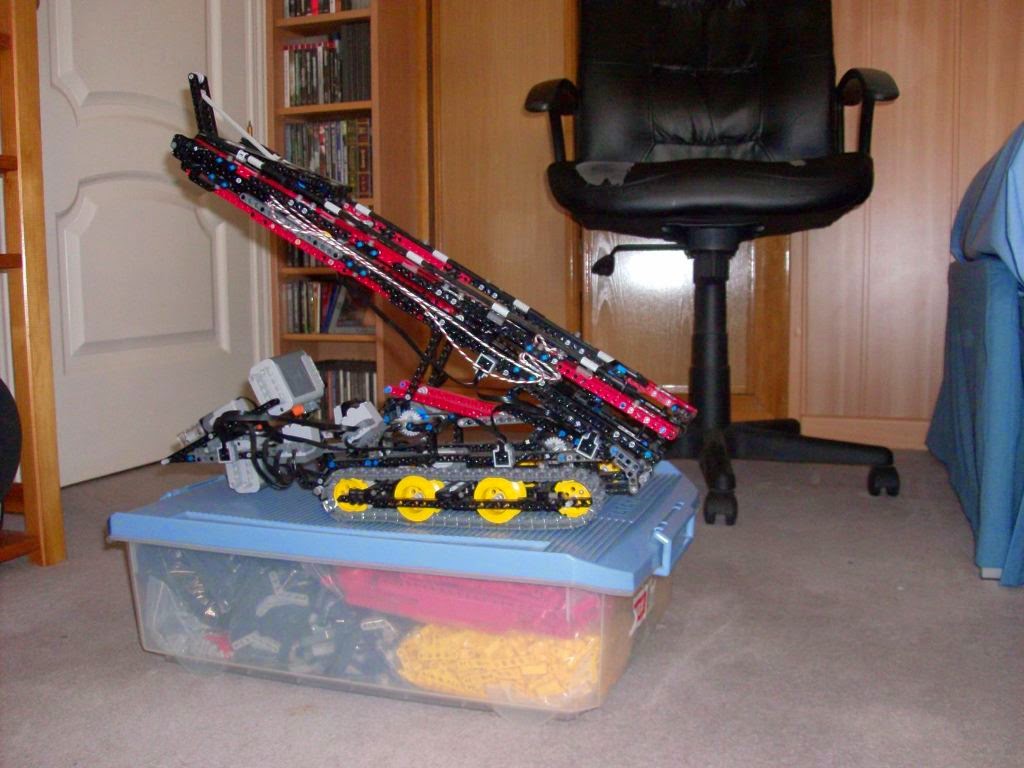
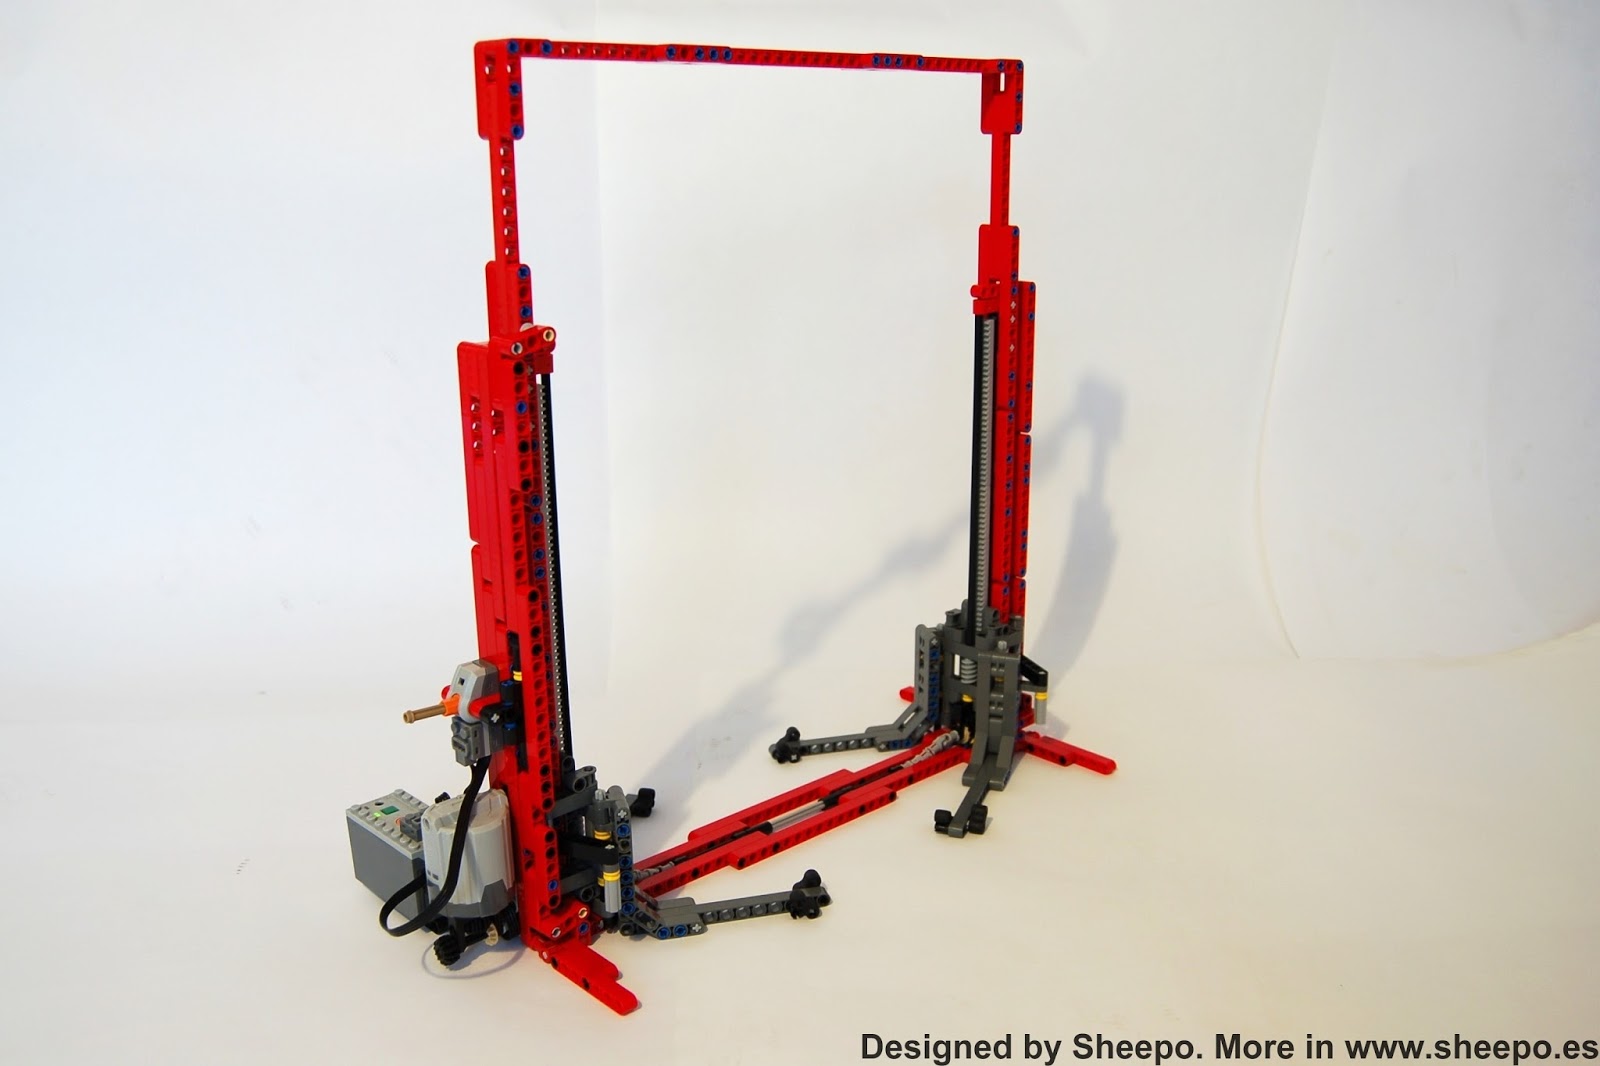
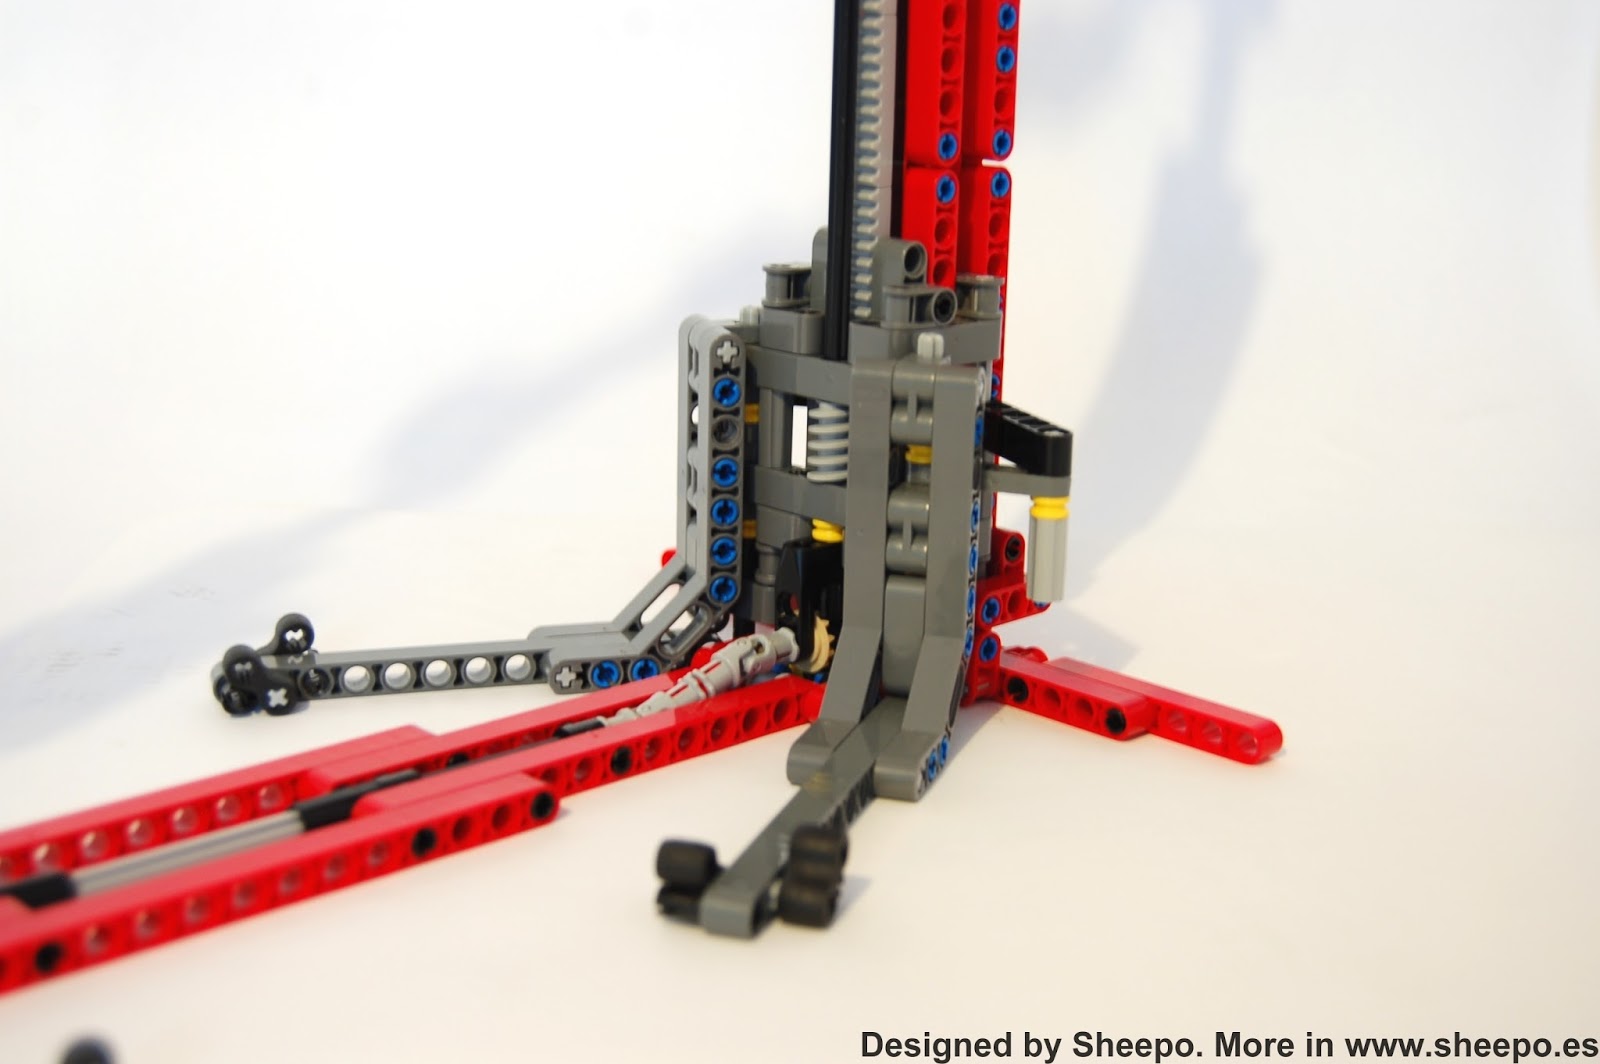
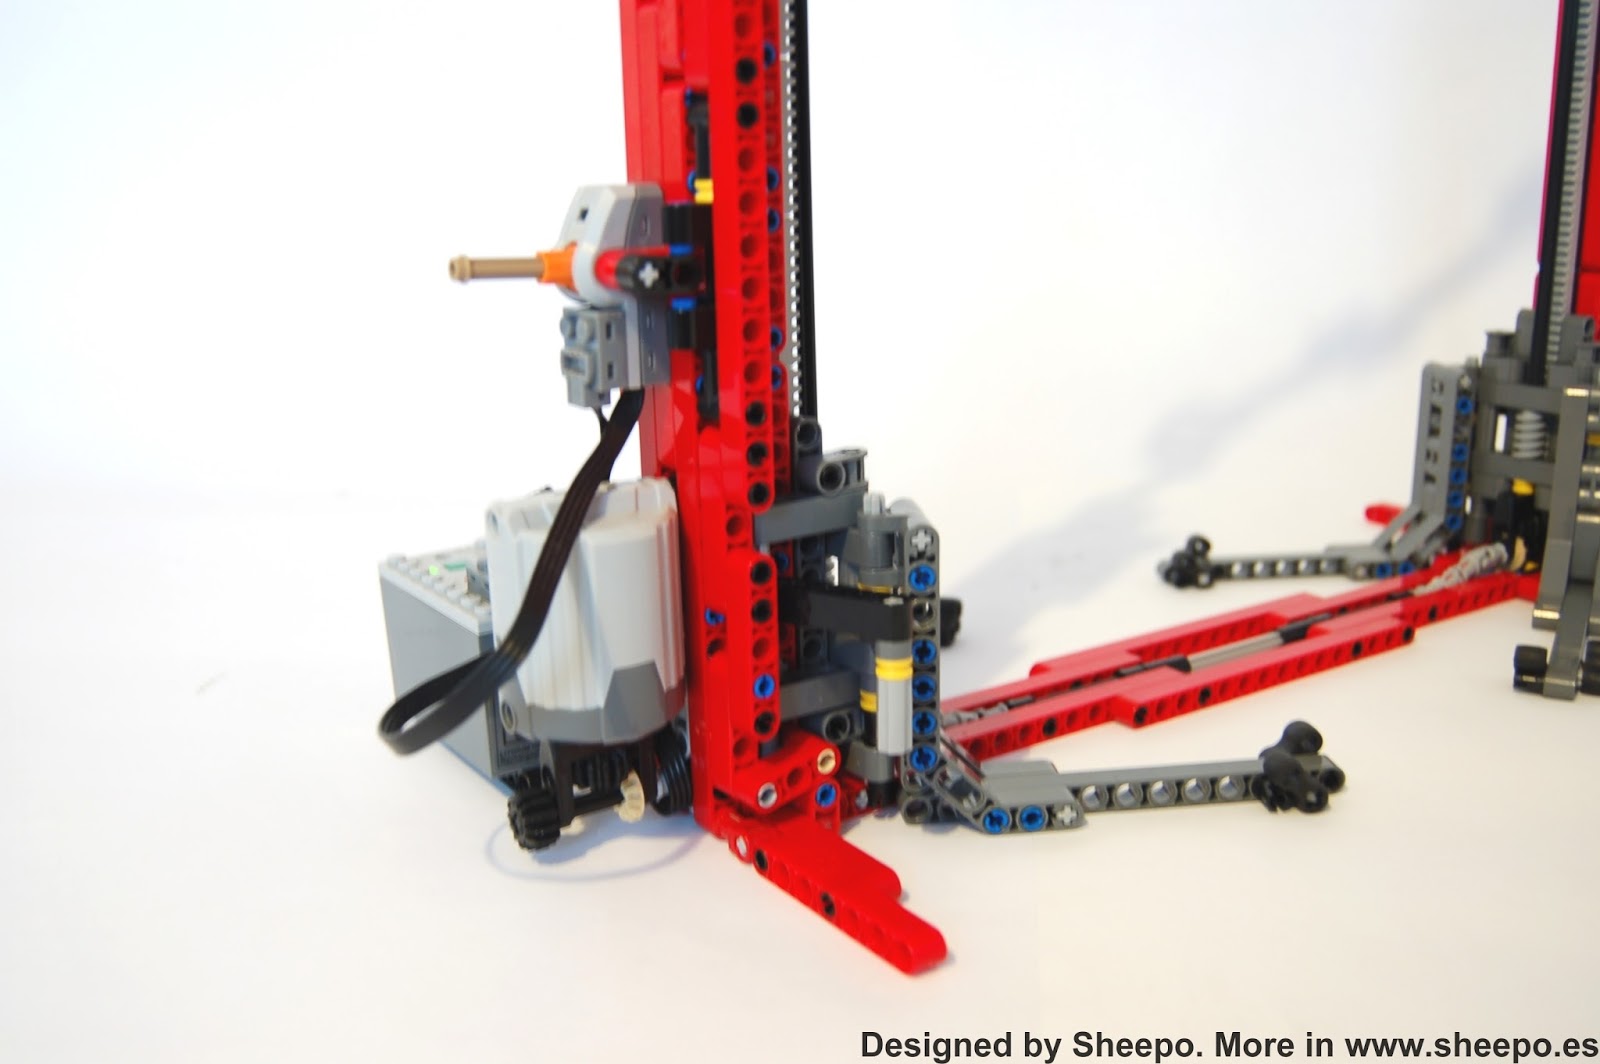
This creation can cross a free space between 80 and 105 cm.
It is powered by 6 PF motors, 3 IR recevers and PF AA battery.
- 2M motors for drive, one for each side - XL motor for the first elevation step - M motor for the couterweigh - XL motor for the second elevation step - M motor to open the bridge
Here the complete secuence to cross a
Step 1 - Place the bridge layer close to the precipice
Step 2 - Lift the first step of the bridge
Step 3 - Open the counterweight
Step 4 - Open the bridge
Step 5 - Lower the complete bridge
Step 6 - Go back a little to drop the bridge
Step 7 - Lift a little bit the main arm
Step 8 - Cross the bridge!!. The deformation of the bridge is done deliberately to reduce the bridge swing. Without that deformation the bridge becomes unstable.
Step 9 - Make a 180 degrees turn.
Step 10 - Lower the main arm and go on a little to connect the arm to the bridge.
Step 11 - Lift the bridge and repeate the steps 1 to 4 in the oposite order.
Unfortunately I don't have more picture or files, but here you a little video in action!!
The instructions come only in RC version, but the Manual ones will be avalible in a few weeks
The original version showed in this website is the RC.
The instructions are made in PDF format, and they look very similar to the LEGO Official ones.
RC Version
The whole car, including the controller has 3355 parts!!!
The instructions have 553 pages, and 192MB
You can download the complete part list HERE () In the file you can find: - The part list in .bsx format, to be open with brickstore sofware - Brickstore software(compatible with Windows and MAC) - The part list in XML formal(.TXT), compatible with bricklink.com - The part list in image format(8 pages) - The part list in images for the different parts of the car: chassis, gearbox, bodywork and controller.
The price is 20€
MANUAL Version COMING SOON
Please, before purchase the instructions read this!
- I only acept payment by paypal, and only in euros(€).
- If you don't receive your instructions after 24 hours of the payment, please check your spam folder, and if the email is not there send me an email to: info @ sheepo.es
- The instructions will be send(actually a link to download it) to the payment email adress. If you want, I'll send you the instructions to a different email adress, please leave a comment in the paypal payment.
- For MAC users: mac can't open zip files with password, to open the instructions you will need an extra software (you will can find a lot of free software in internet to do it).
- Build this car is very hard, if you have never built a Lego Technic set, I recommend you to do it first. Doing that is not necessary but it will help you later when you built the Mustang
Also you must think that the pieces are not perfect, so the gearbox are not 100% reliable, it should make good around the 90% of the speed changes
- What happens if I lose my instructions copy(hard drive failure or virus)? -> I have a data base with all costumers of my instructions, if you lose it you can email me and will send it to you again free.
- There is any Lego Technic set which I can buy to reduce the parts cost? -> No, The only sets with some parts in common with this MOC are 42000 and 8070.
After many cars and other land vehicles, now its time to build something different.
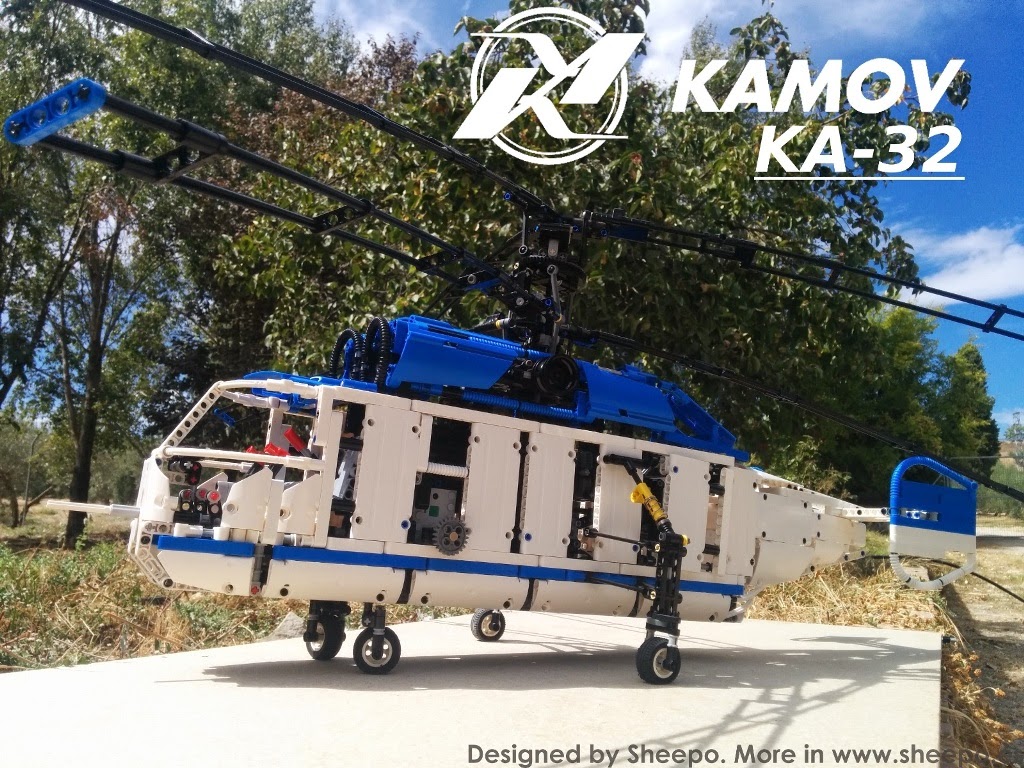
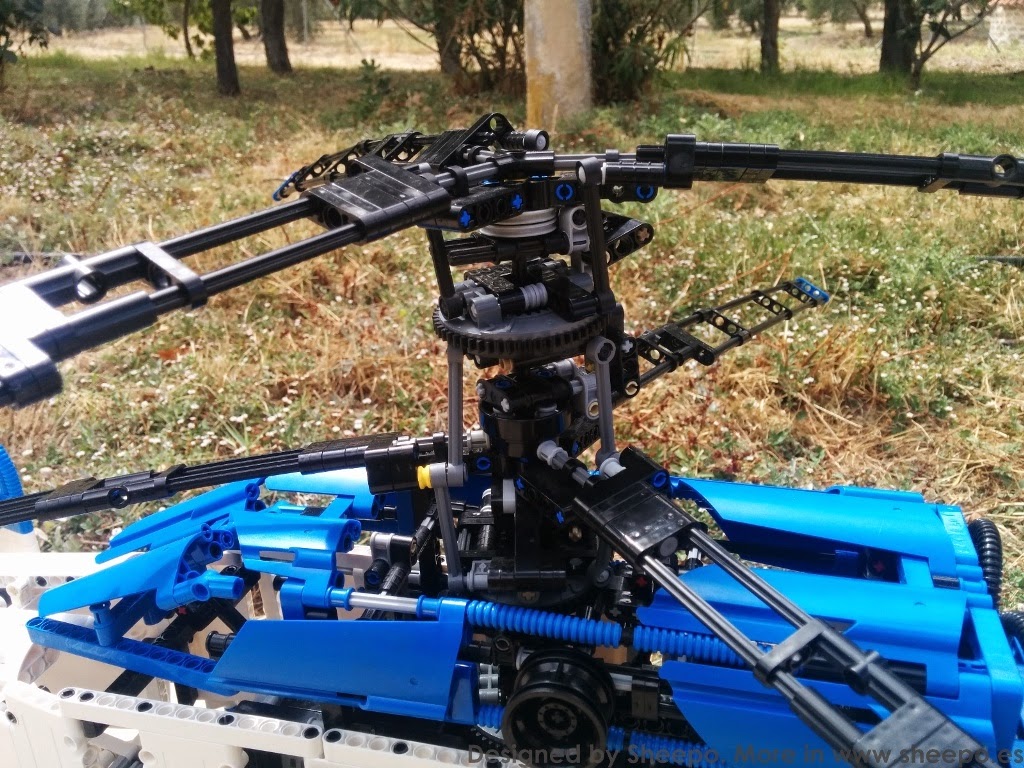
This creation is based in the Russian helicopter Kamov KA-32.
This helicopter has the peculiarity that it has two coaxial rotors turning in opposite directions, instead of the traditional main rotor with a small tail rotor.
Very important note: This creation is a technical demonstration about how a coaxial helicopter works, but actually this MOC can NOT fly!! It is impossible build a 100% Lego machine that actually can fly by itself.
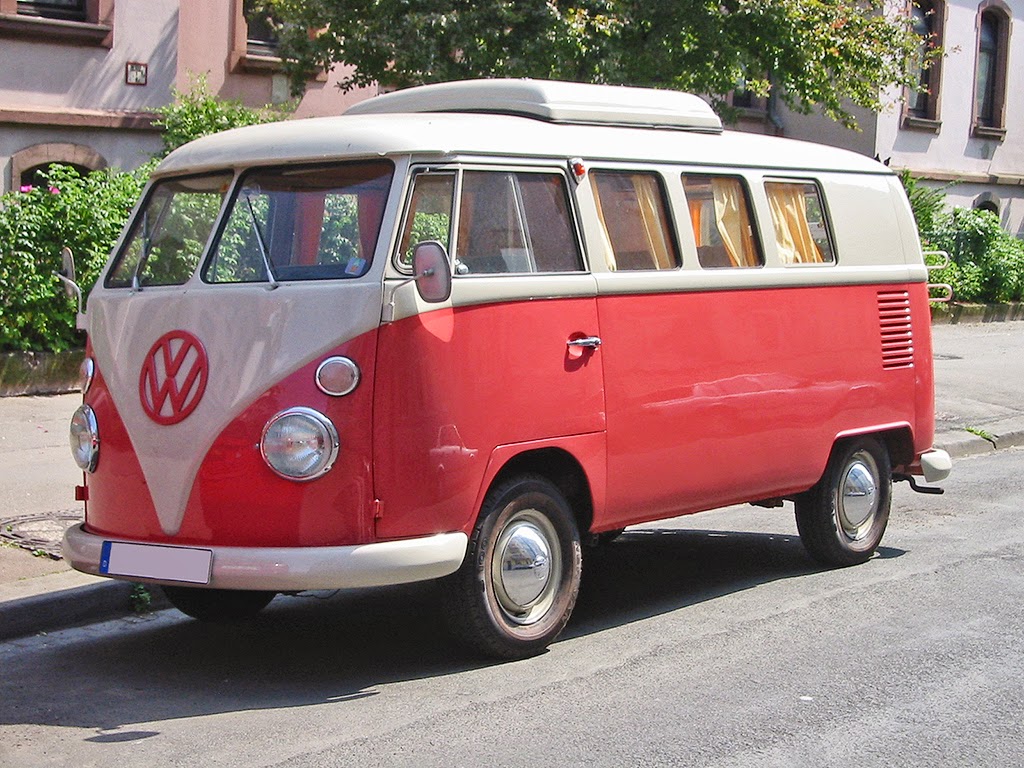
A real Kamov KA-32 used in Spain for firefighting. I have used the same color scheme .
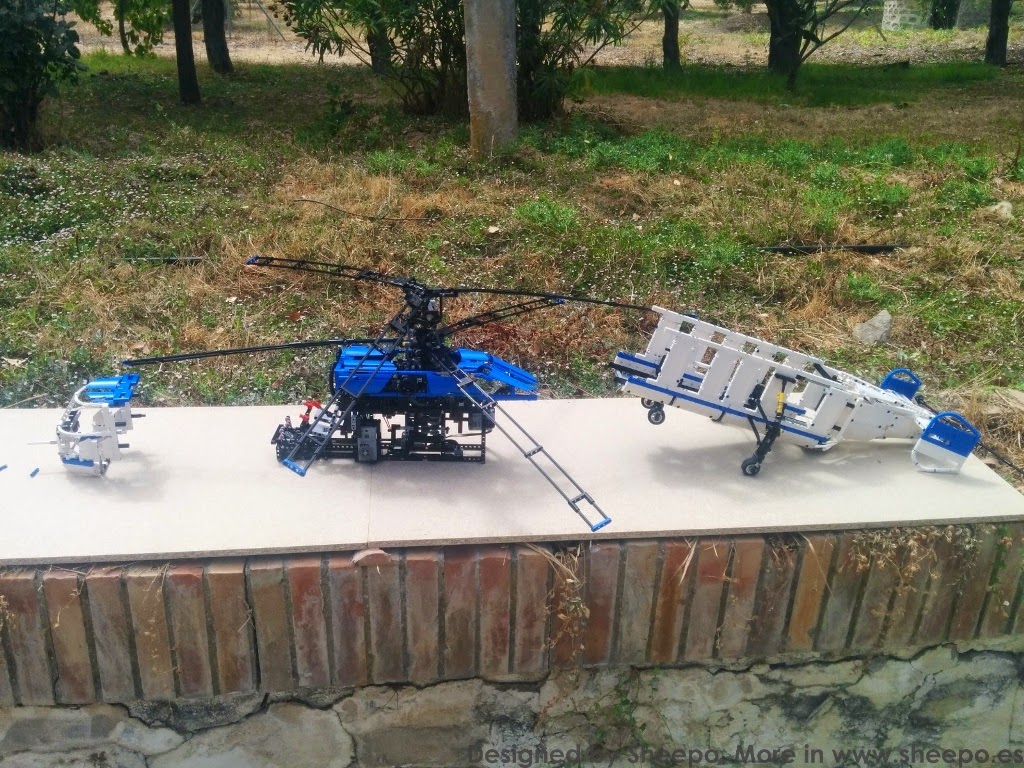
This MOC has been build in scale 1:16. The rotors has a diameter of 127 studs(102 cm or 40 in.)
The fuselage size is 98x15x23 studs (78x12x18 cm or 30.7x4.7x7.1 in.)
Both rotors are powered by only one PF XL motor and a PF Rechargeable battery(ref. 8878).
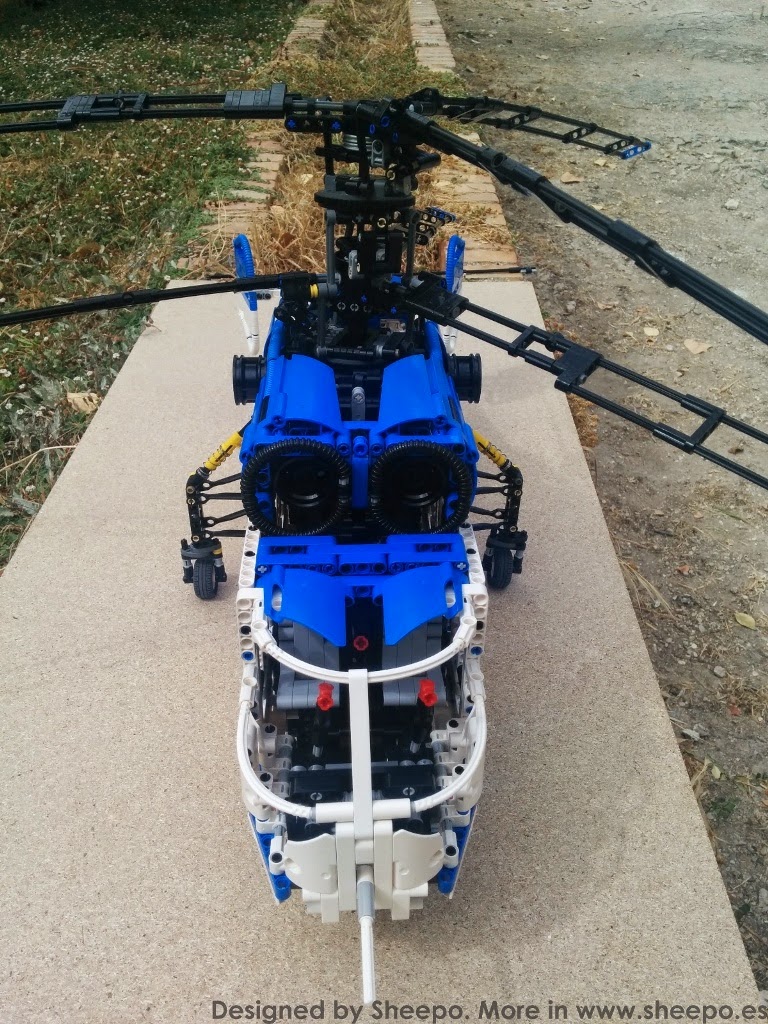
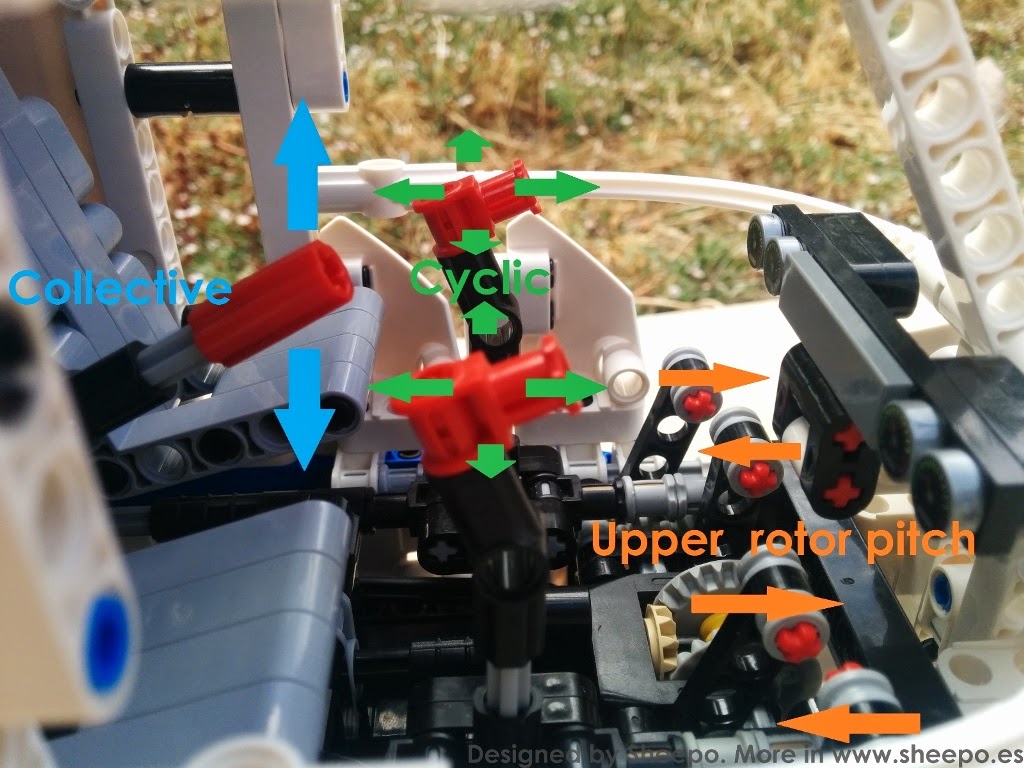
Complete rotors control using two swashplates directly from the cabin. Just like the real KA-32.
The concept for the Type 2 is credited to Dutch Volkswagen importer Ben Pon. Pon visited Wolfsburg in 1946, intending to purchase Type 1s for import to the Netherlands, where he saw an improvised parts-mover and realized something better was possible using the stock Type 1 platform. He first sketched the van in a doodle dated April 23, 1947, proposing a payload of 690 kg (1,520 lb) and placing the driver at the very front. Production would have to wait, however, as the factory was at capacity producing the Type 1.
When capacity freed up, a prototype known internally as the Type 29 was produced in a short three months. Coincidentally the wheelbase was the same as the Type 1's. The engineers reused the reduction gear from the Type 81, enabling the 1.5 ton van to use a 25 hp (19 kW) flat four engine.
The first production model, now designated Type 2, rolled off the assembly line to debut 12 November of 1949.
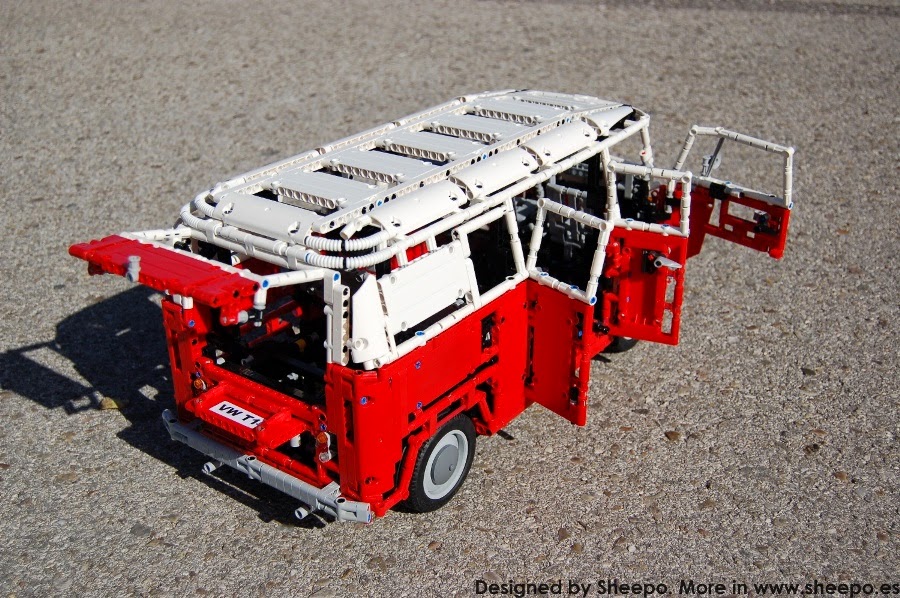
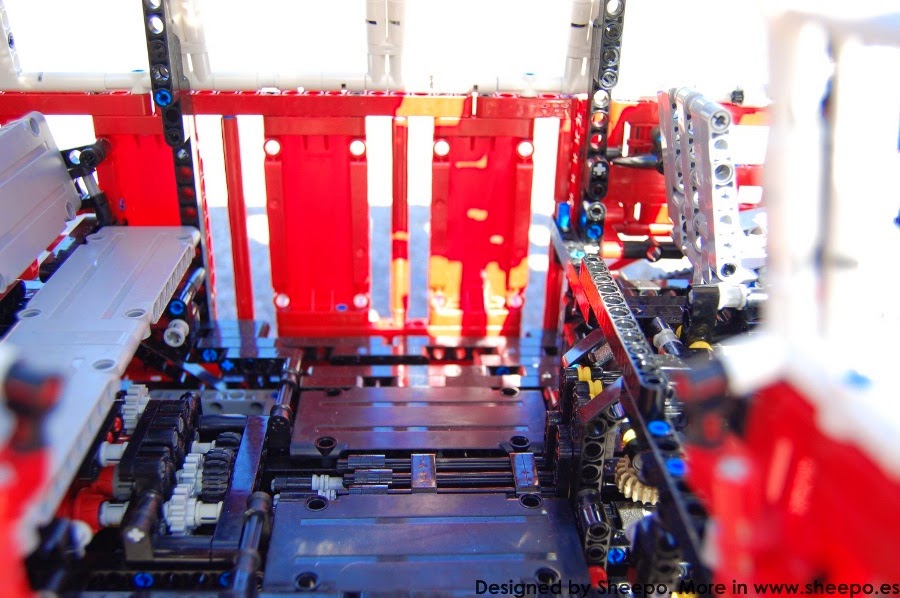
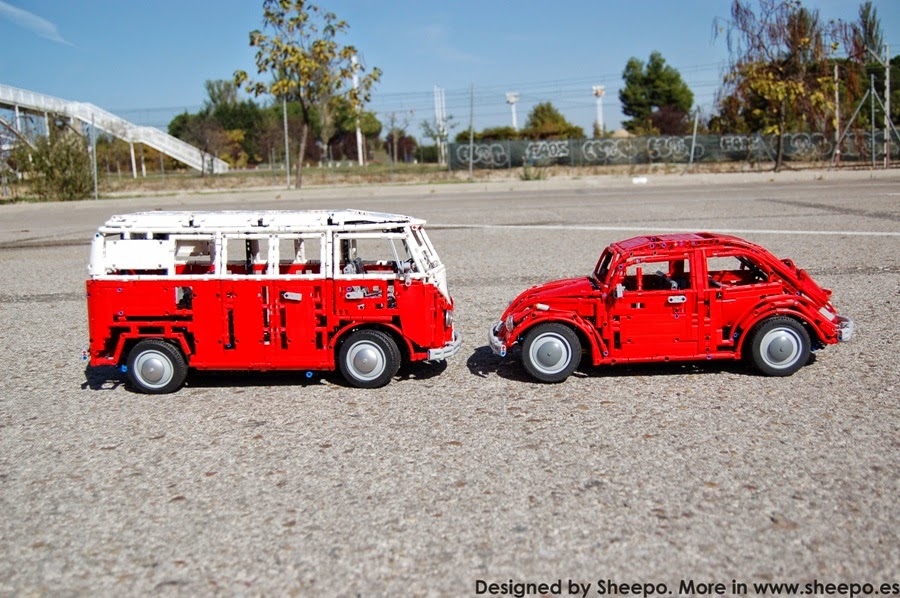
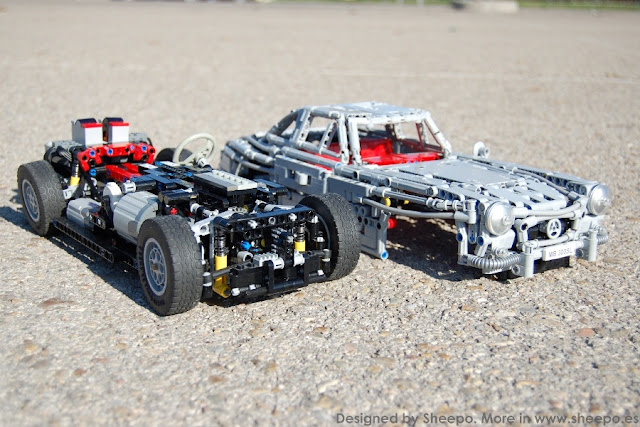
This creation is made in scale 1:7.8. The total size is: 66 studs of length, only 27 wide and 30 of high (53x22x25 cm)
The weight is 2.6 kgs(3kgs in the RC version), with around 3500 parts.
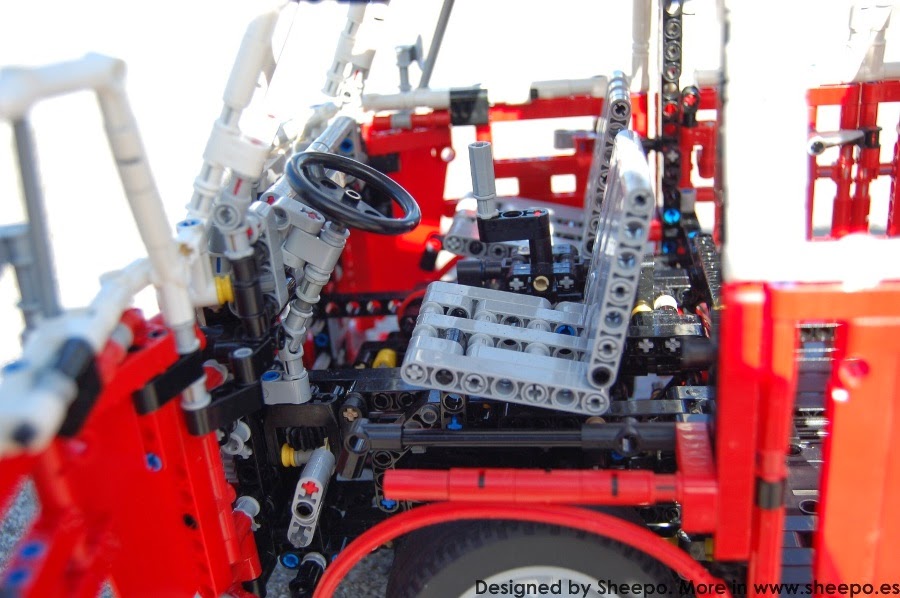
A complete bodywork with openable front doors, right side double door, and rear trunk and bonnet.
Also the doors have lock, you need turn the door handle to open it.
It has front full size seats and rear bench-seat.
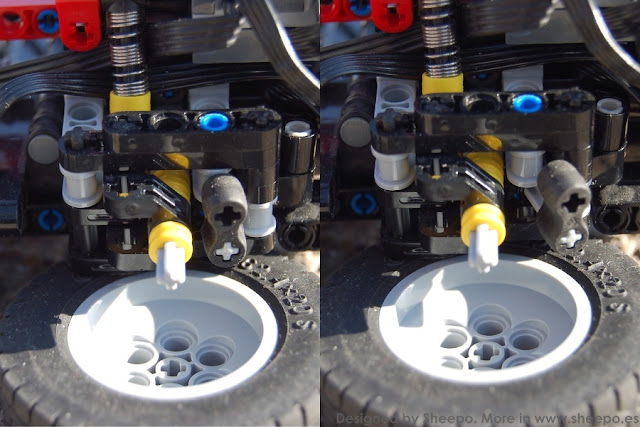
Front rigid beam independent suspension with disc brakes.
Rear swing axle with drum brakes
Working steering wheel and brake pedal. Like the Beetle both mechanisms auto-connect when you place the bodywork on the chassis.
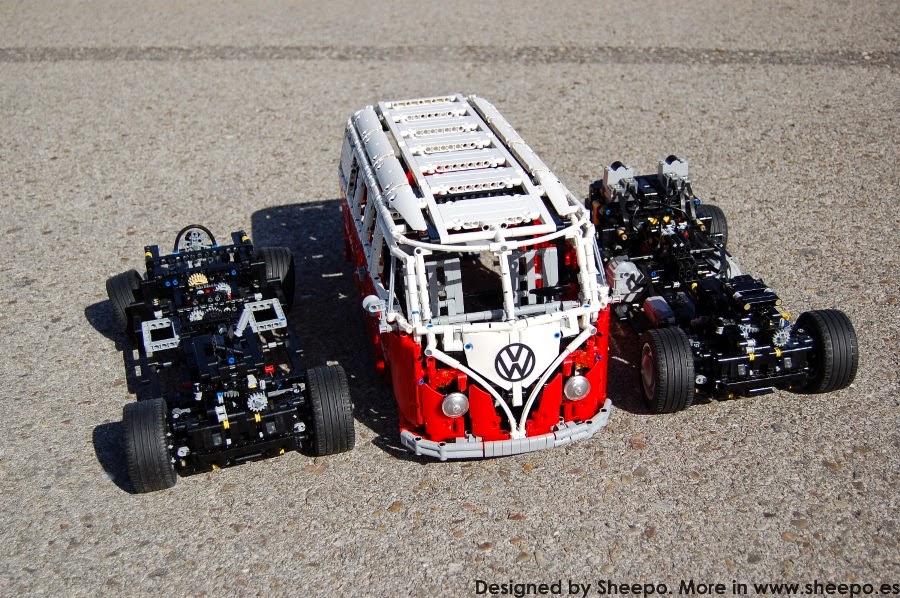
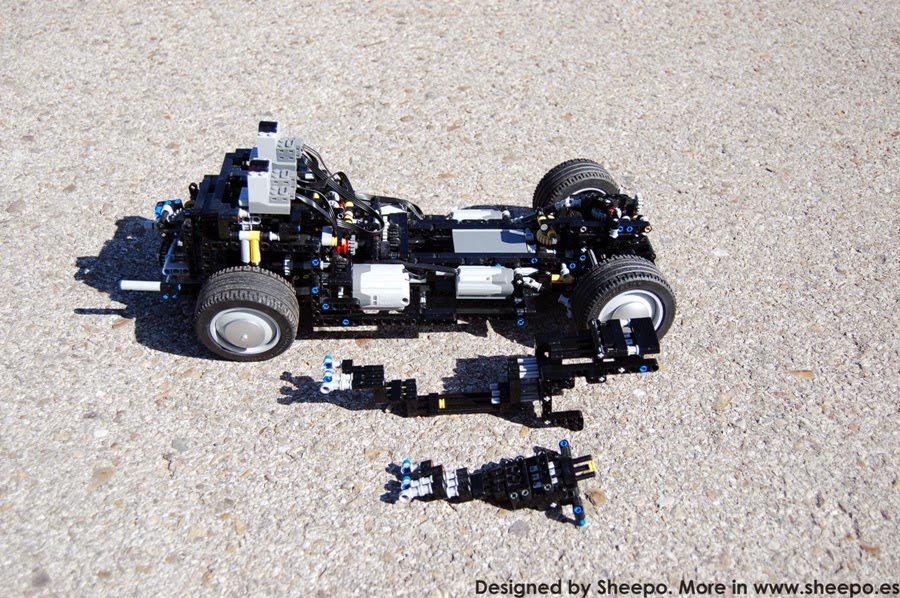
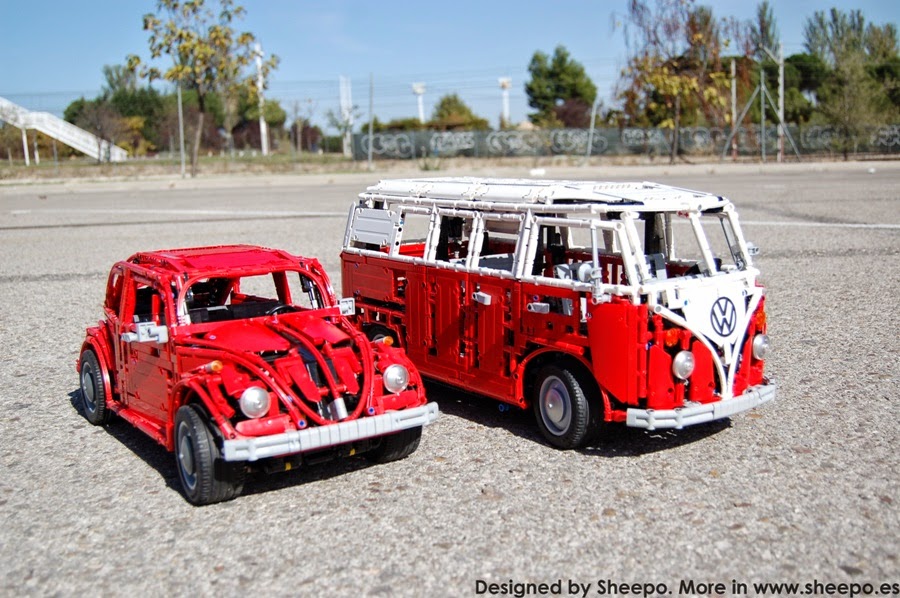
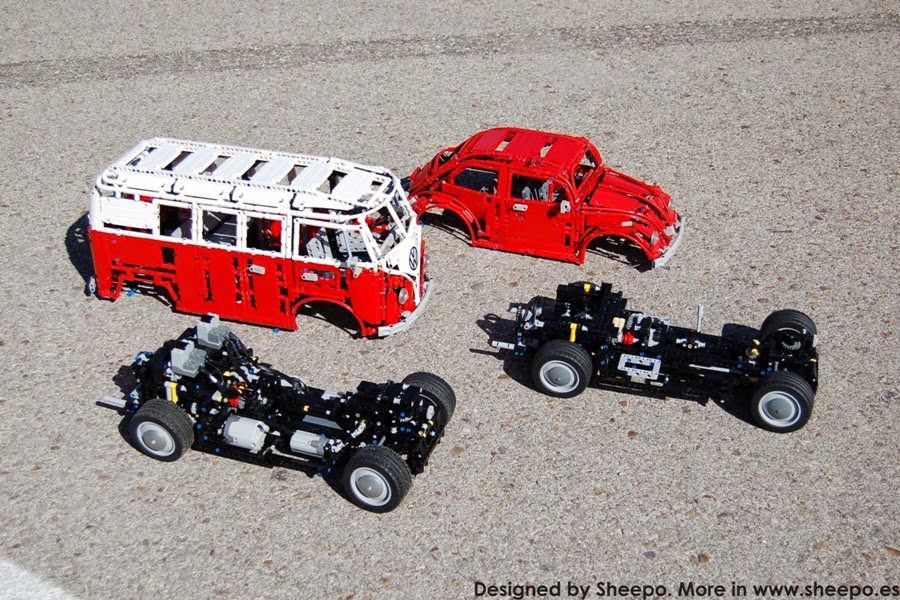
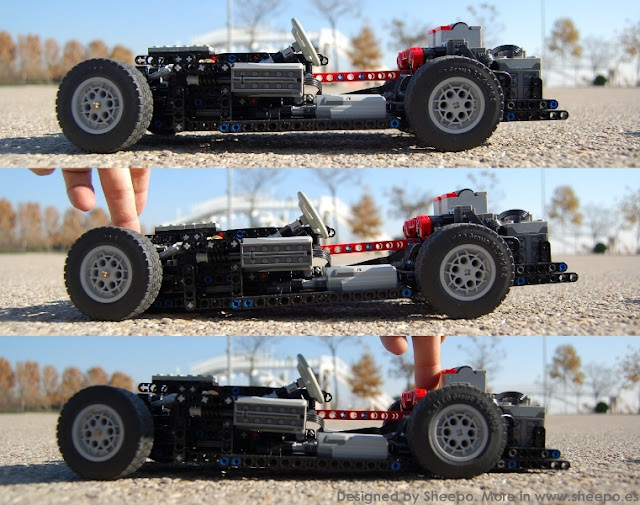
Like the real Type 2, this MOC uses the same Type 1 platform of my previous Beetle (more info here)
MANUAL chassis on the left, and RC chassis on the right.
This Type 2 release the new MANUAL chassis, it will be avalable for the Beetle coming soon.
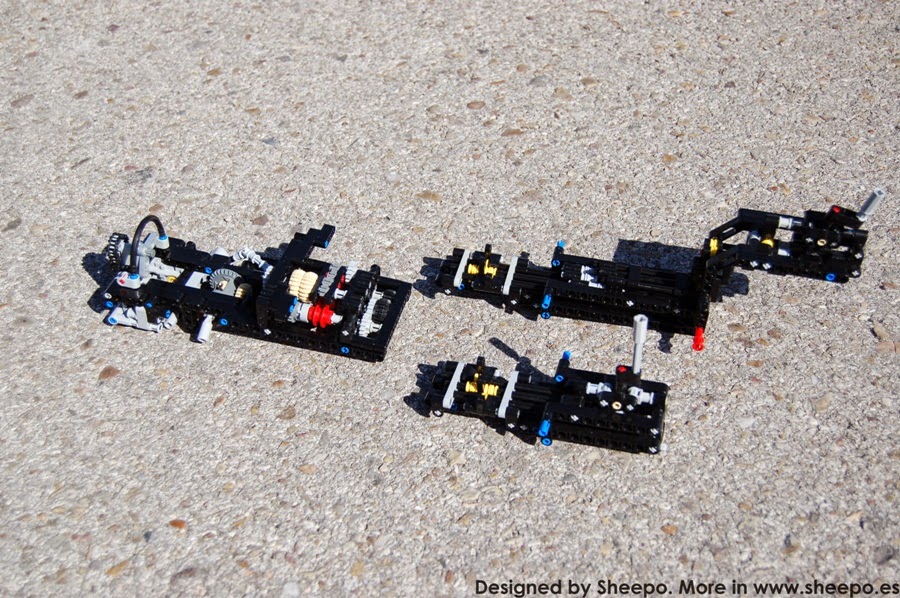
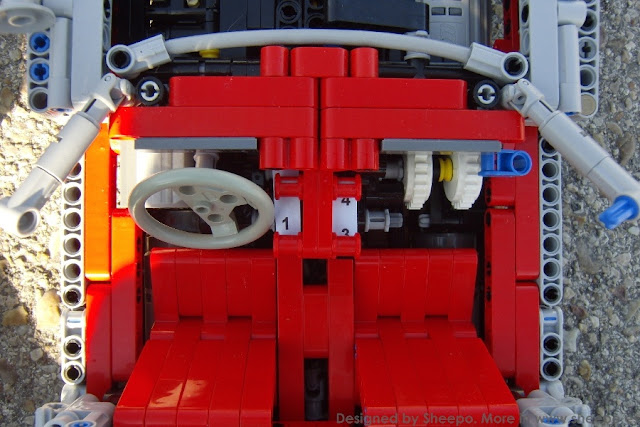
MANUAL CHASSIS
The gearbox has 4+R speeds.
The gearbox is in the back of the T1, but the shift lever is placed between the front seats.
RC CHASSIS
As always it includes some remote controlled functions: - Steering (M motor) - Drive (2 XL motors) - Sequential gearbox (PF Servo motor) - Brakes (M motor) The sequential gearbox has with 4+N+R speeds and as always with auto-clutch.
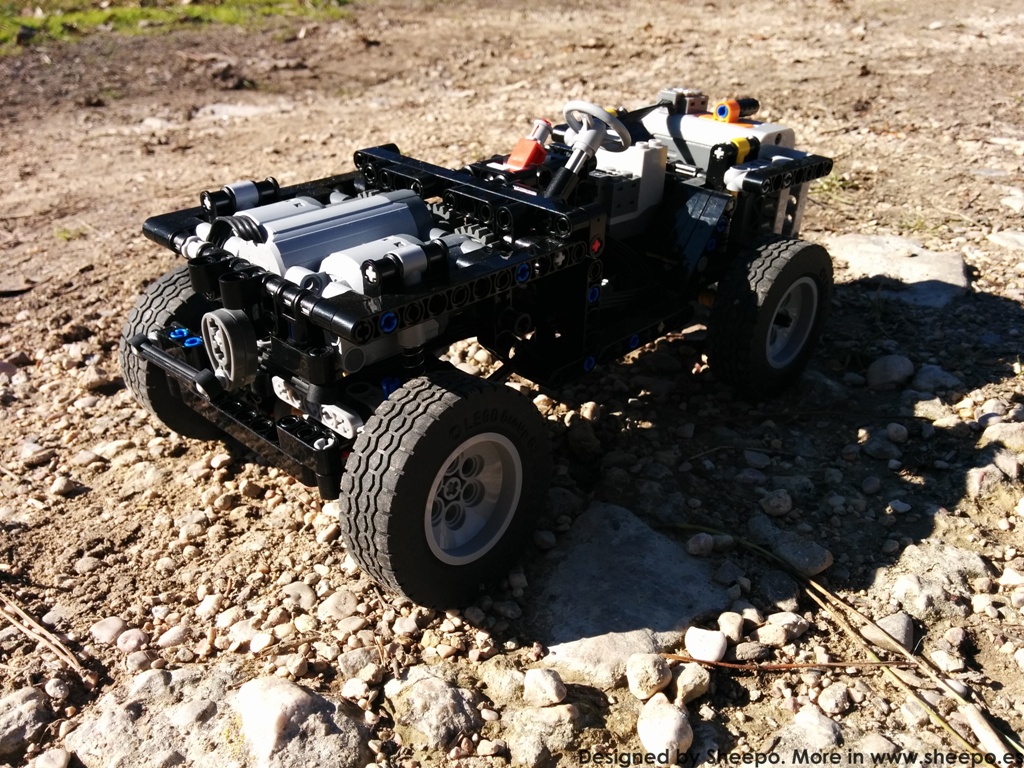
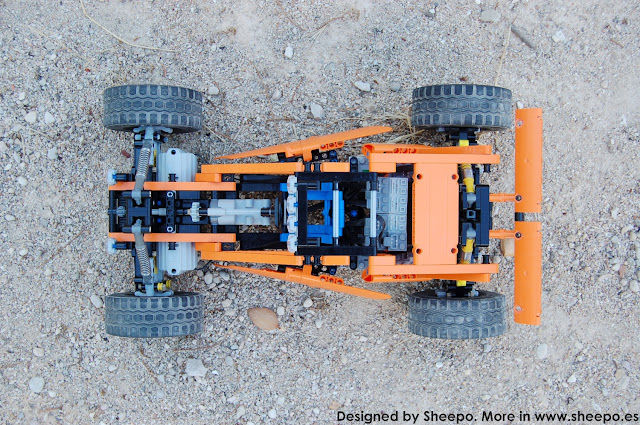
I am here again to show you something new and I think very insteresting.
Some months ago a topic started by piterx, inspired to design a little, fast, simple and funny 4x4.
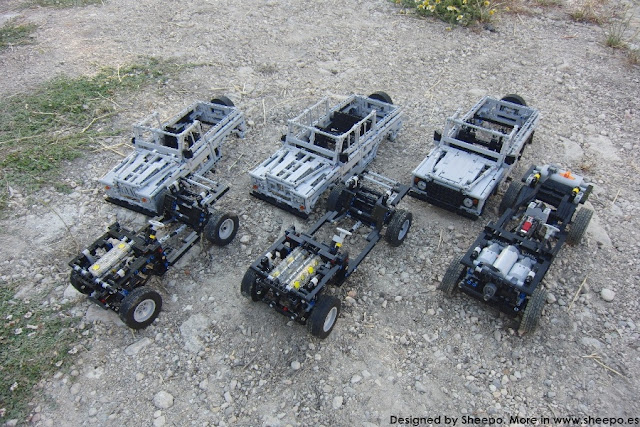
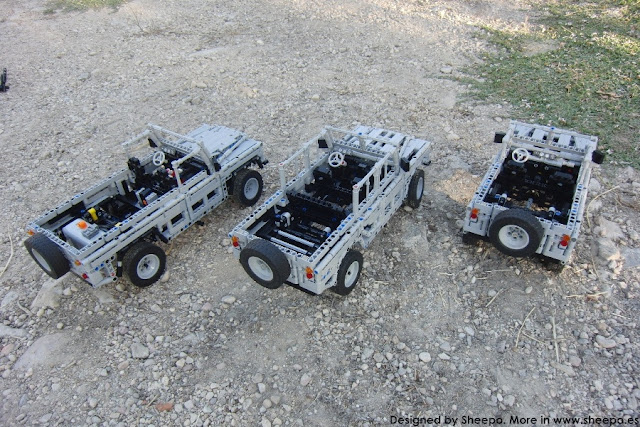
My original idea was build again a Land-Rover Defender in small scale to help to the people who likes my previous Defender but it is too much big and expensive.
But when I was starting the car I though about that will be even more interesting if I design a chassis which can be used in many differents 4x4. I finnally designed a modular 4x4 platform.
I have called it Modular All-terrain Platform (MAP)
This platform can be used in almost all 4x4s with live axles. I this category you can find many Jeeps, Land-Rovers, Toyotas and many other famous 4x4.
This MOC has been designed to be easy to built, very strong and light, funny to drive and as cheap as possible.
The width is 17 studs.
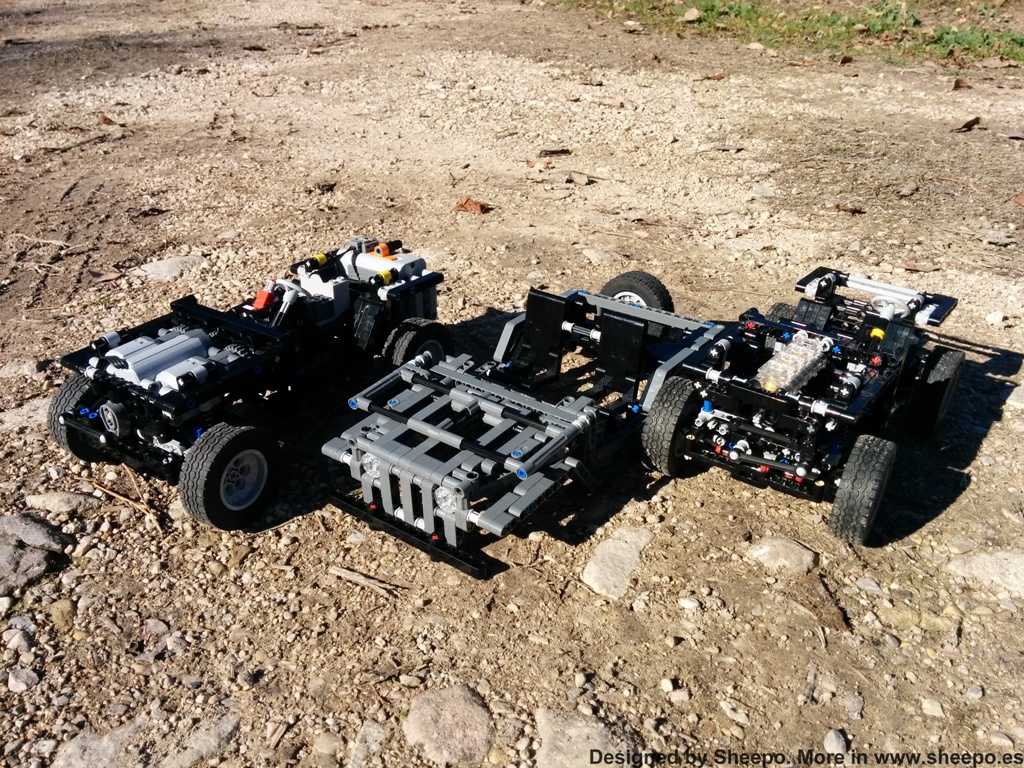
The chassis comes in two versions RC and MANUAL, with many features, some of them common, and other specific for one version.
Common features
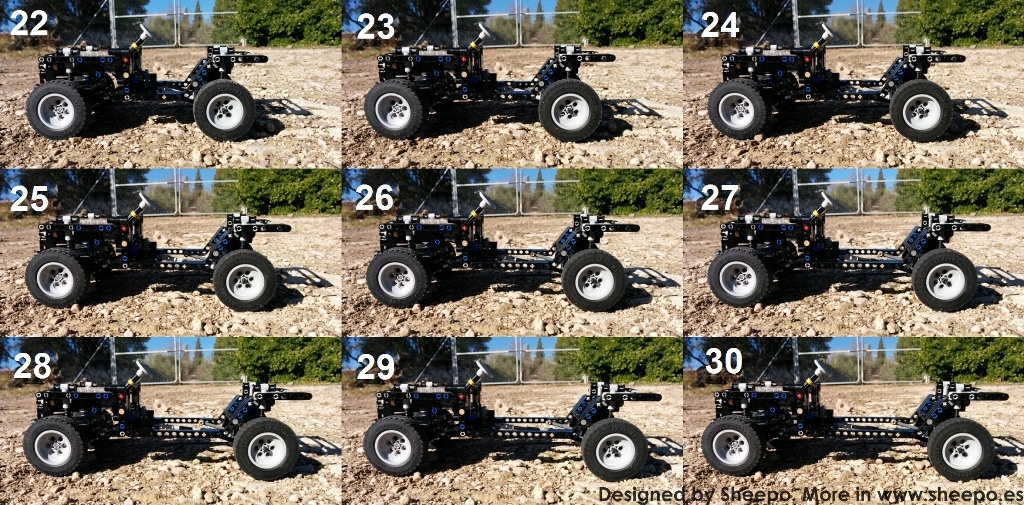
- Wheelbase
The most important feature in this platform is the option to change the wheelbese very easily and quickly. You only need to change 3 parts, yes only 3 parts to use any wheelbease you want between 22 and 30 studs, without change any other part in the chassis.
With all this options you can use it in any vehicle you want and the bodywork will always fit correctly and very proportionate.
I have studied many 4x4 and the wheelbase between 22 and 30 with 17 studs of wide is enough to built almost any real 4x4 ever built.
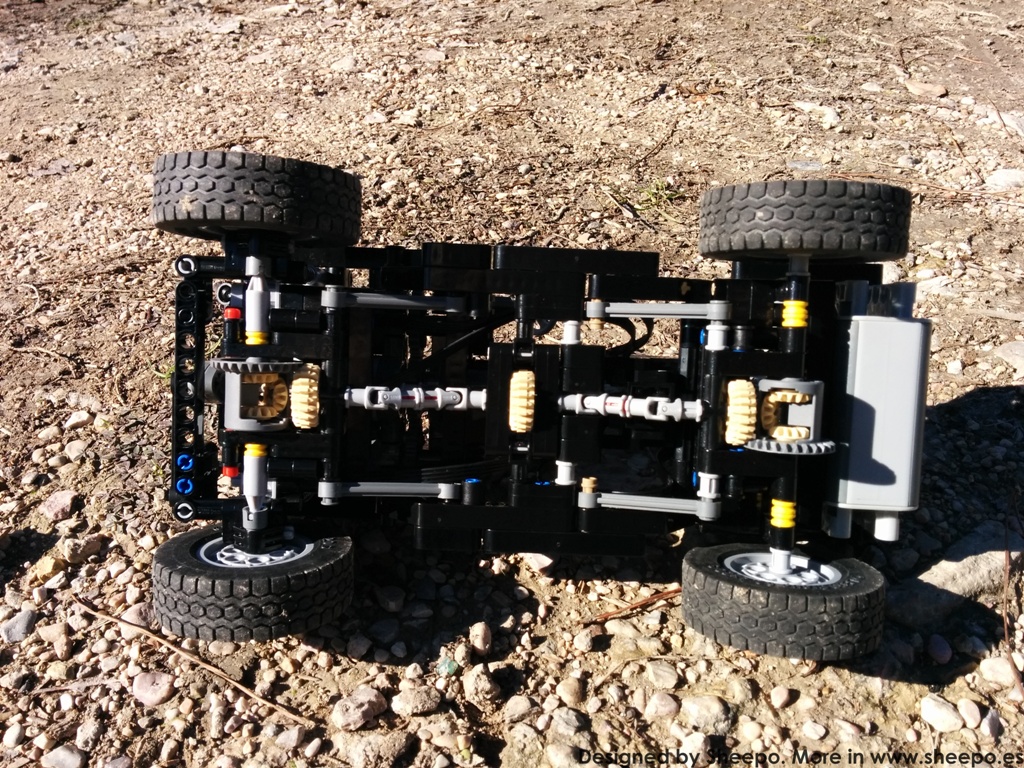
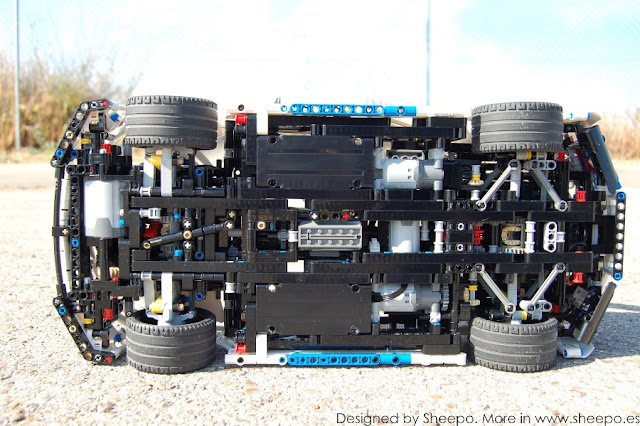
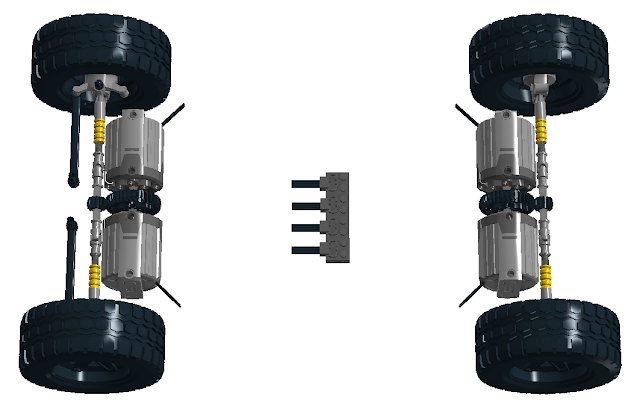
- 4WD
The chassis has permanent 4x4 traction with two differentials. This platforn has not been designed to be used like a Truck Trial, so it is better use differentials and increase the usability on smooth surfaces.
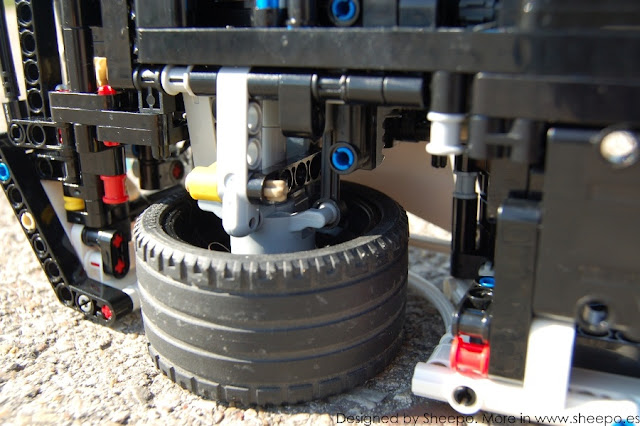
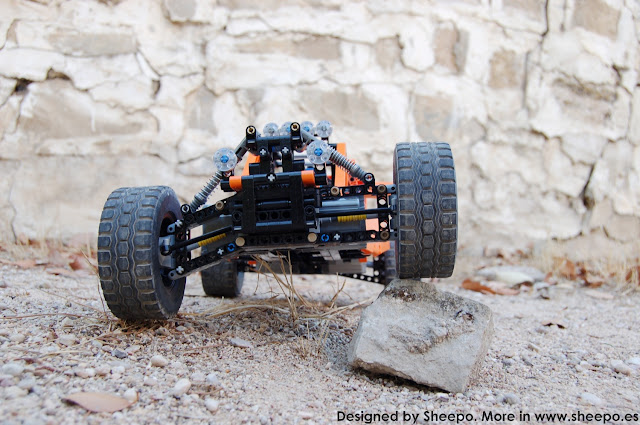
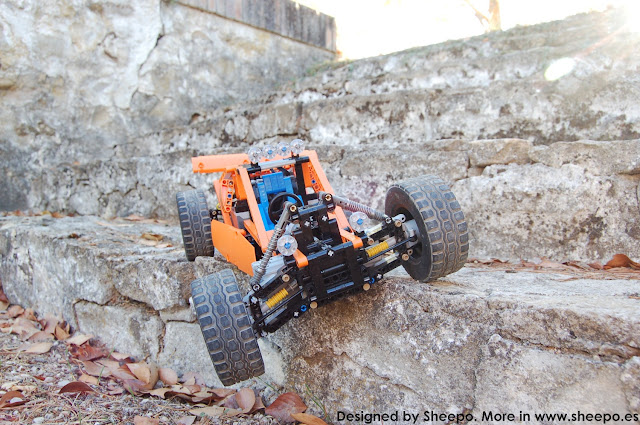
- Live axles suspension
Like the bests 4x4 this chassis has live axles with 3-links configutation in front and rear. Also it has good suspension travel, specialy in the rear axle .
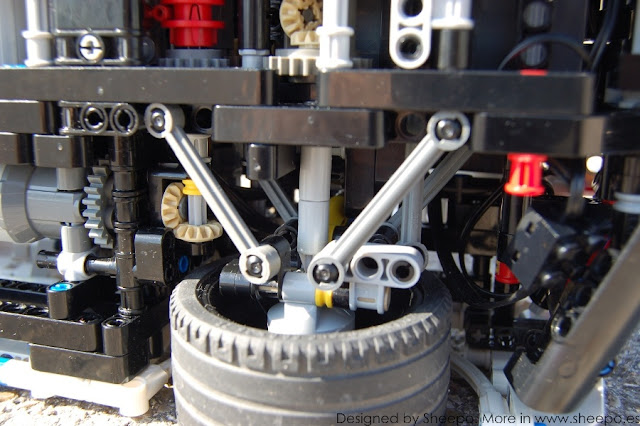
- Steering by push-pull bar
Again like the real 4x4s the front axles use a bar system to make the steering works. Very realistic, strong and reliable.
I have measured more than 30 differents 4x4 to fix the steering wheel in the best possible position.
MANUAL VERSION FEATURES
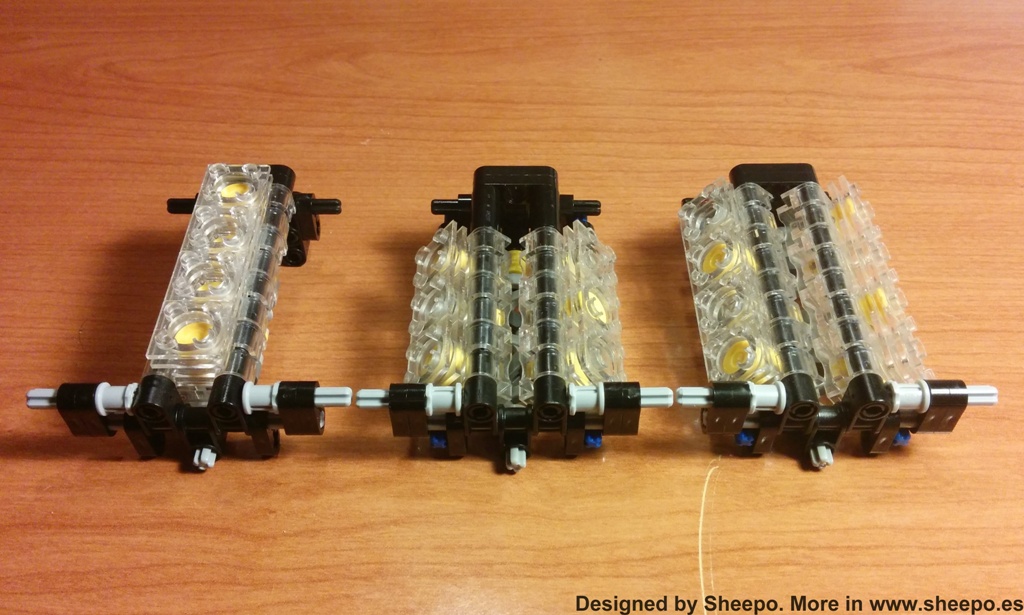
- Interchangeable fake engine
To be used in all possible 4x4s, it is necessary to have the options to use differents fake engines. I have included 3 differents engines: L$, V6 and V8. I have not added a L6 because there are not enough space to fit it.
You can change the motor in less than 10 seconds.
- Working steering wheel
The position of the steering wheel is exactly the same as the RC version.
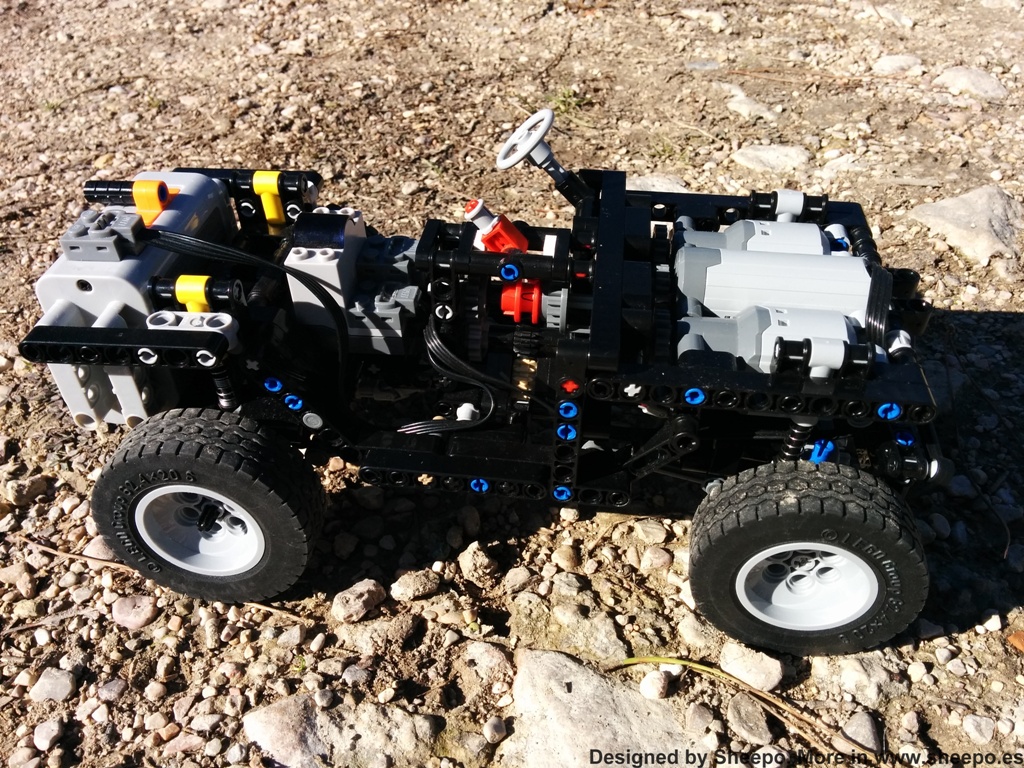
RC VERSION FEATURES
- Powered by PF
Like the name sais, this version has Power Functions. It uses a servo motor fot the steering and 2L motors for drive. Actually the whole PF system is exactly the same as the set 9398 (Crawler).
- 2 speeds gearbox
This version also includes a 2 speeds manual gearbox. Perfect to go fast on flat floors and slow cross-country.
The gear ratios:
Low - 1:1 - Max speed: 1.3kph High - 1:3 - Max speed: 4kph
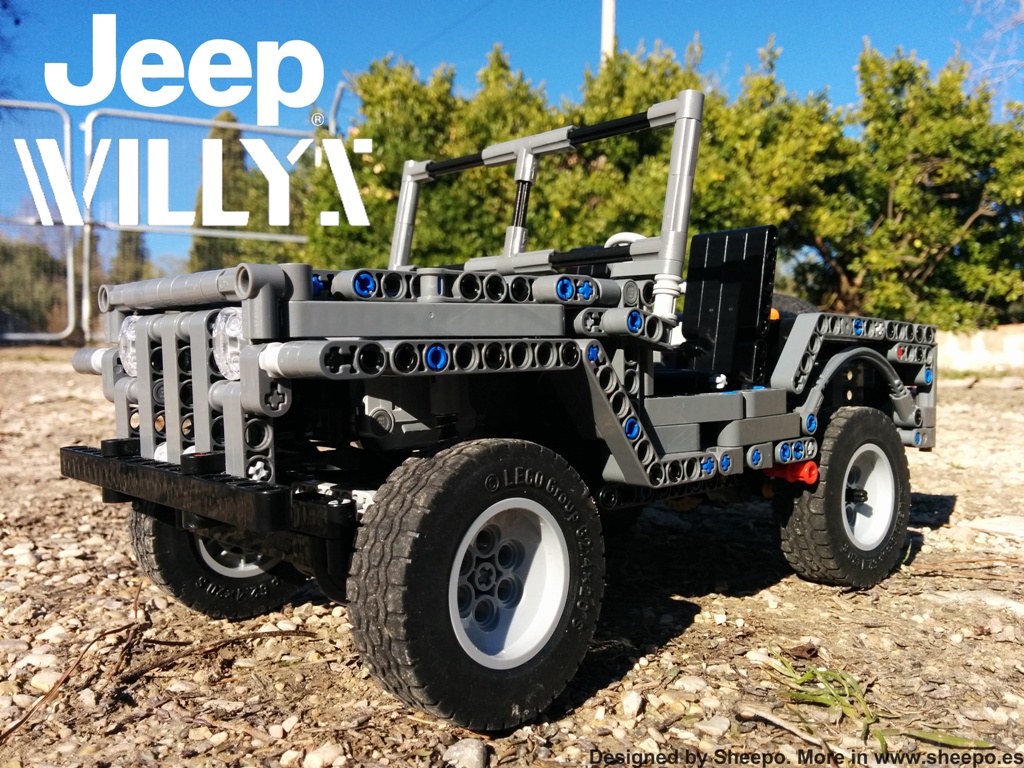
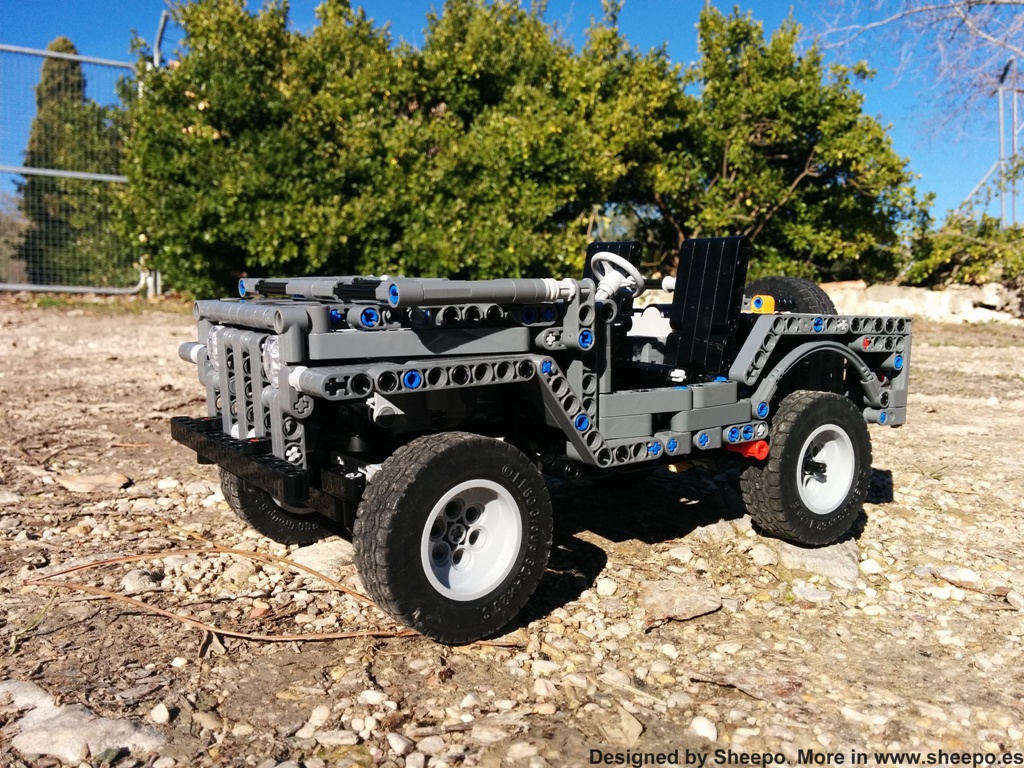
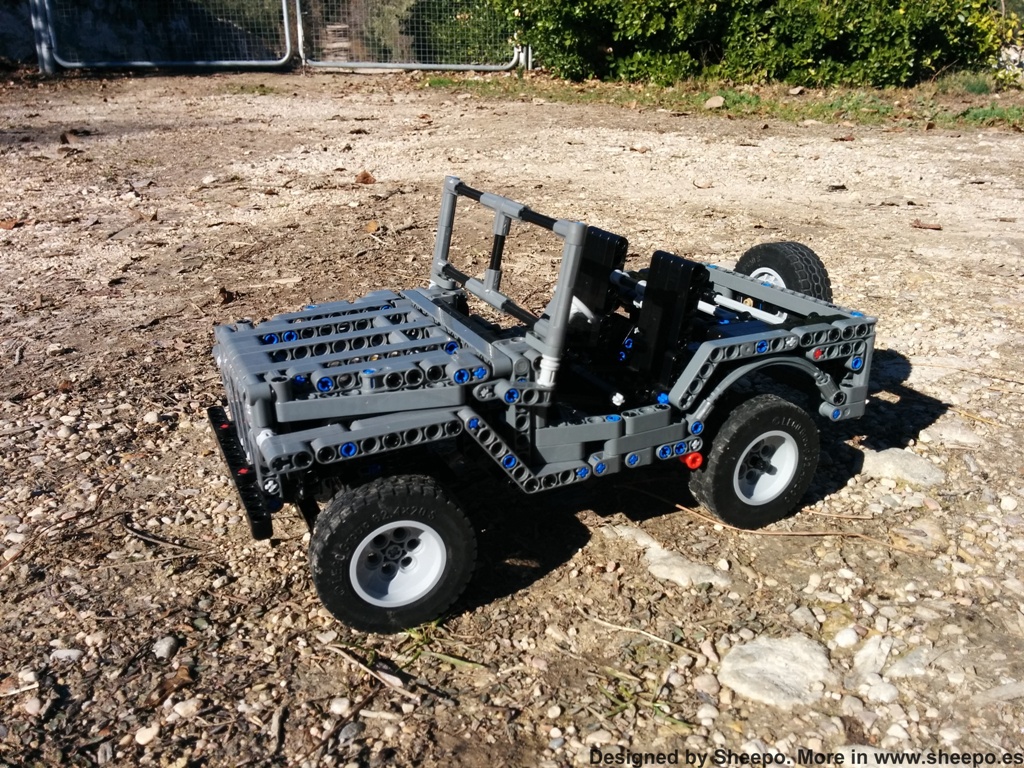
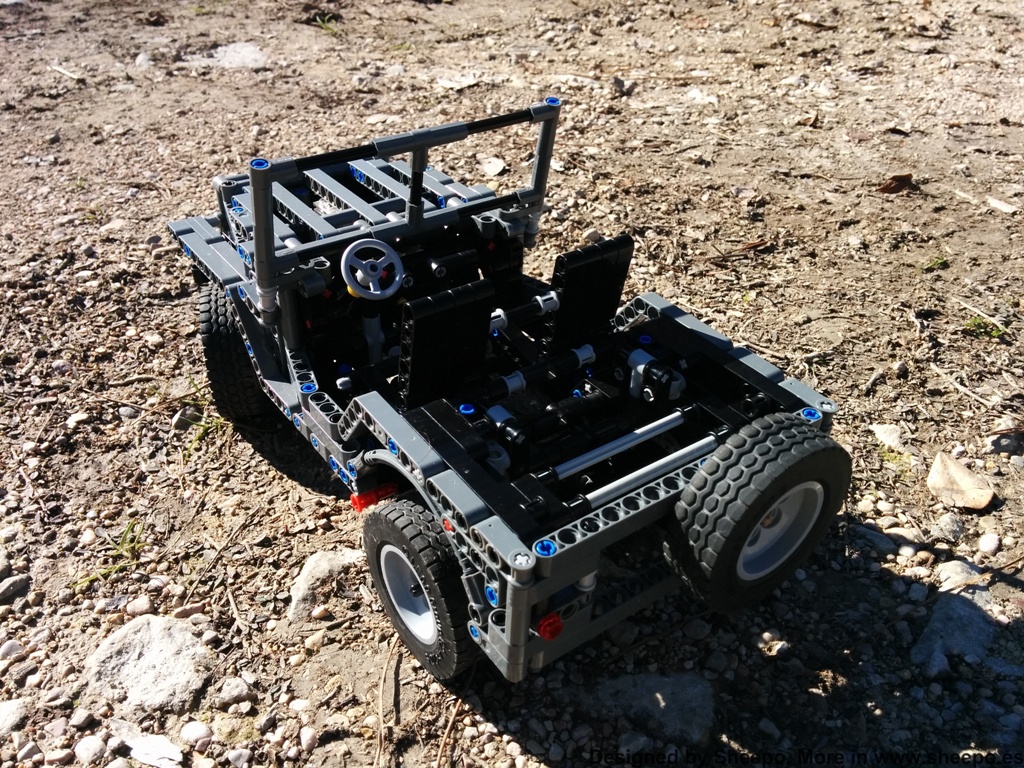
Jeep Willys
One of the most famous 4x4 vehicles ever made.
This is the first bodywork I have designed because it is small and simple to build, and at the same time very famous and
The exacly scale for the Willys is 1:11.6
Now as always a little video showing how it works.
Complete instructions for both versions avalable now!!
The instructions are made in PDF format, and they look very similar to the LEGO Official ones.
IMPORTANT NOTE: The instructions and the part list of both chassis include the steps to build all different wheelbases and fake engine configurations. So if in the future you want yo buy a new bodywork you only need to buy the bodywork if self, not the chassis again. Or if you want RC and Manual versions of any car you only need to buy one bodywork.
RC Chassis Instructions
The chassis and the controller have 455 parts!!!
The instructions have 109 pages, and 25MB
You can download the complete part list HERE In the file you can find: - The part list in .bsx format, to be open with brickstore sofware - Brickstore software(compatible with Windows and MAC) - The part list in image format(3 pages)
The price is only 5€
MANUAL Chassis Instructions
The whole car, including the controller has 507 parts!!!
The instructions have 117 pages, and 25MB
You can download the complete part list HERE In the file you can find: - The part list in .bsx format, to be open with brickstore sofware - Brickstore software(compatible with Windows and MAC) - The part list in image format(3 pages)
The price is only 5€
Jeep Willys Bodywork
The whole car, including the controller has 396 parts!!!
The instructions have 61 pages, and 16MB
You can download the complete part list HERE In the file you can find: - The part list in .bsx format, to be open with brickstore sofware - Brickstore software(compatible with Windows and MAC) - The part list in image format(3 pages)
The price is only 5€
Please, before purchase the instructions read this!
- I only acept payment in euros(€). Better with Paypal
- If you don't receive your instructions after 48 hours of the payment, please check your spam folder, and if the email is not there send me an email to: info @ sheepo.es
- The instructions will be send(actually a link to download it) to the payment email adress. If you want, I'll send you the instructions to a different email adress, please leave a comment in the paypal payment.
- For MAC users: mac can't open zip files with password, to open the instructions you will need an extra software (you will can find a lot of free software in internet to do it).
- If you buy it, you can't resale it or share with anybody
- The instructions has been tested by a Lego Technic expert builders, if you can't built the car and you think the instructions are wrong, please check your built twice before ask me.
Finally to buy it click here
Jeep Willys and RC Chassis Instructions (10€)
Jeep Willys and MANUAL Chassis Instructions (10€)
Only Jeep Willys Bodywork Instructions (5€)
Only RC Chassis Instructions (5€)
Only MANUAL Chassis Instructions (5€)
Frequently Asked Questions
- What is the best site to buy the parts? -> www.bricklink.com
- What happens if I lose my instructions copy(hard drive failure or virus)? -> I have a data base with all costumers of my instructions, if you lose it you can email me and will send it to you again free.
- There is any Lego Technic set which I can buy to reduce the parts cost? -> No,
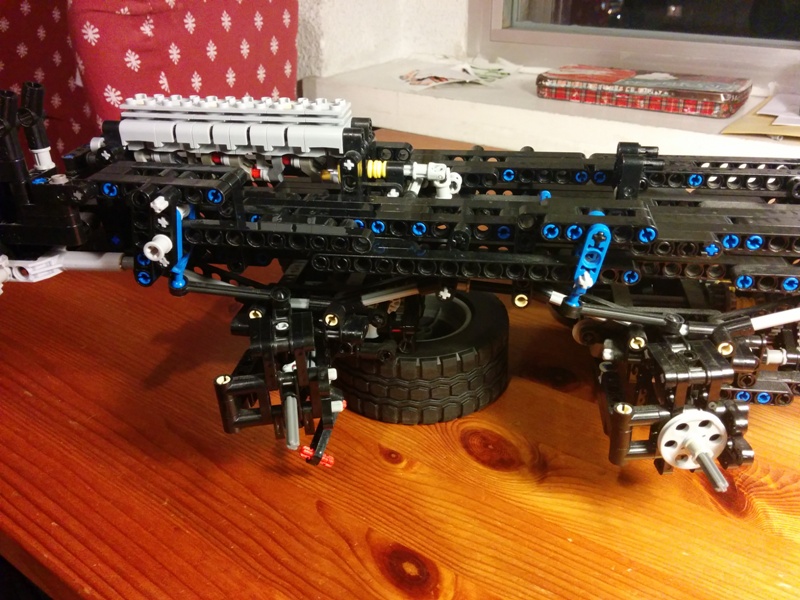
With the new big Technic set 42043 Mercedes-Benz Arocs coming to the stores I want to share my unfinished and abandoned Arocs.
Two years ago a Mercedes Trucks dealership in Spain asked me about built a Arocs 8x8 for them in big scale. When I had the chassis finished they decide don't buy me the truck, so I stopped the development, but I kept the chassis assembled because I didn't need the parts for other projects.
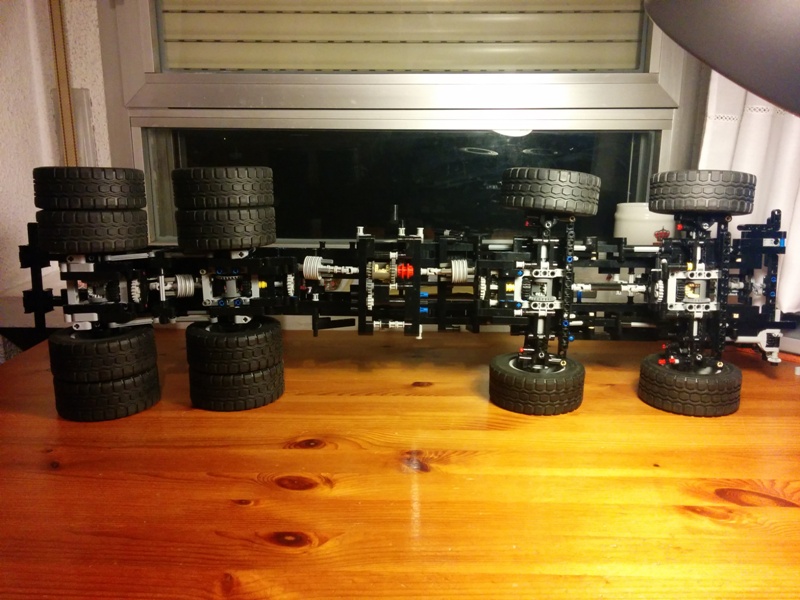
This is what I built (the chassis has tons of dust... but after two years on a shelf is normal ;) )
It is built in scale 1:11.
The overall chassis size is 29 studs wide and 90 studs of length.
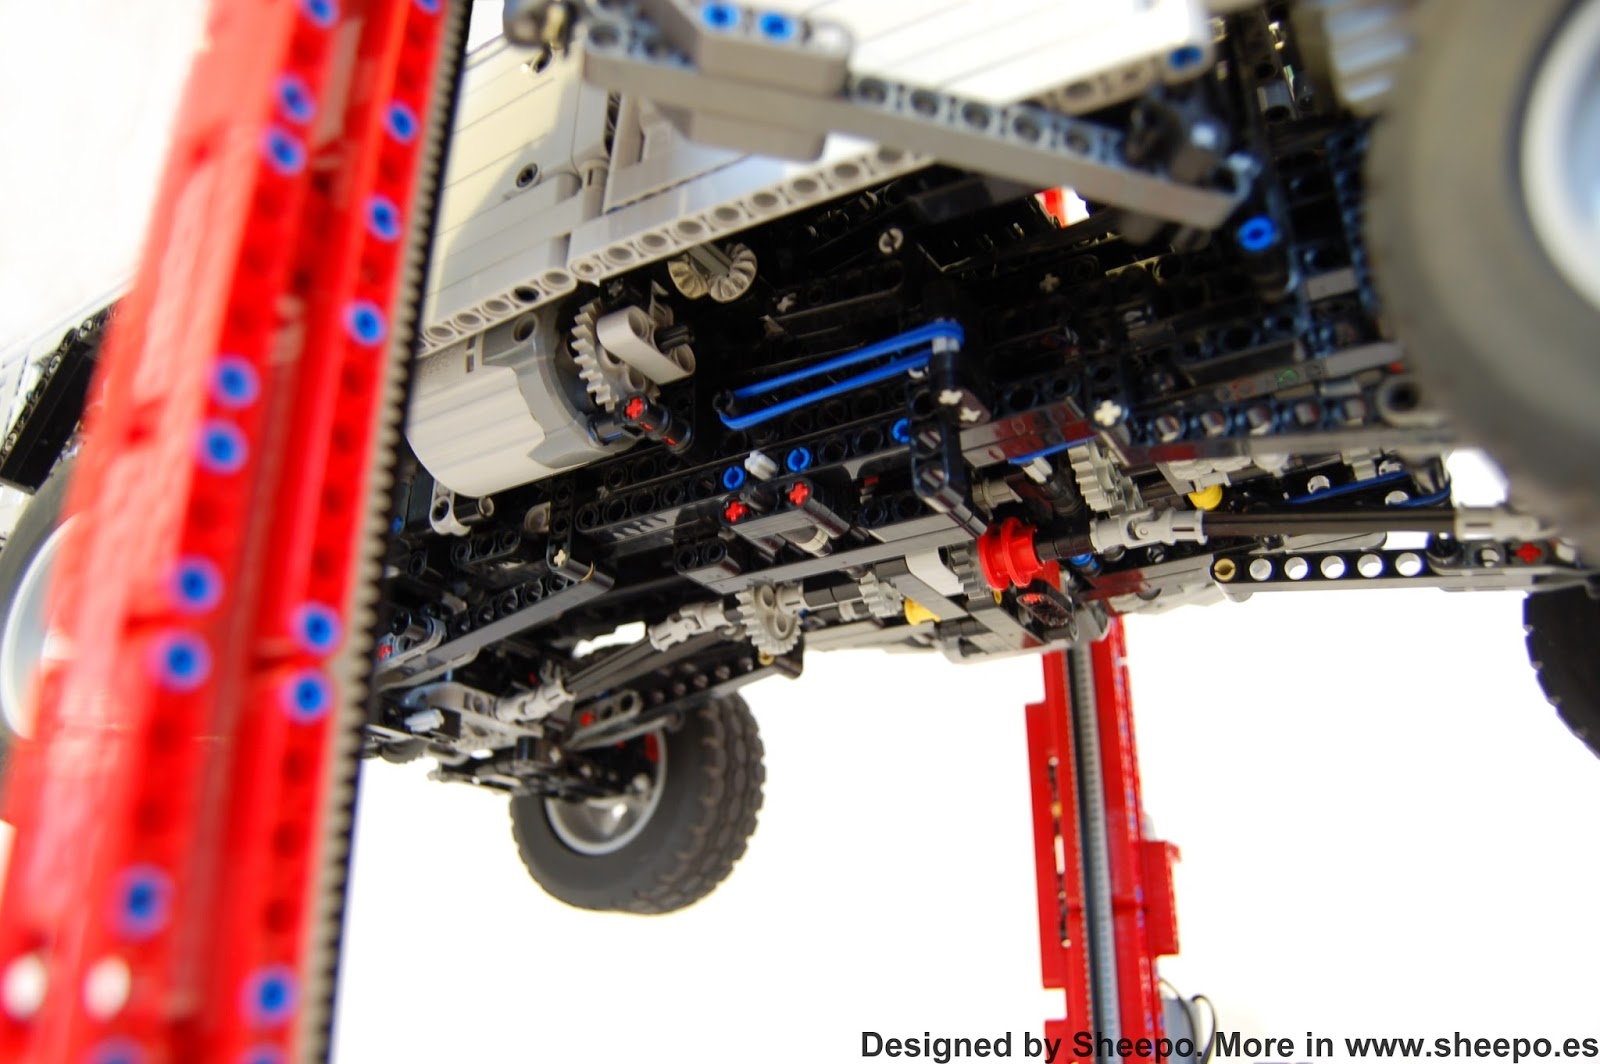
Front axles
They are like the real Arocs, solid axles with leaf springs, disc brakes(yes, the real Arcos can have disc brakes in the front), complete ackerman steering with linkage mechanism.
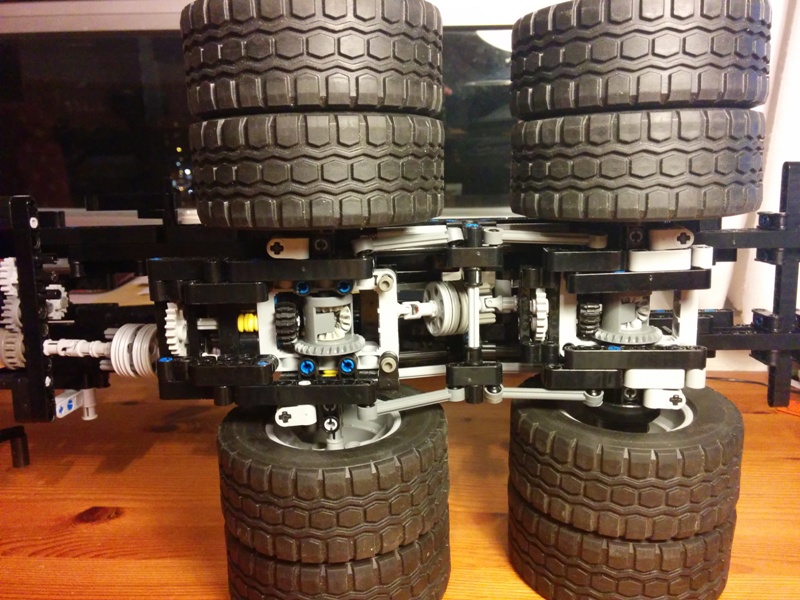
The second axle includes two differentials: the second axle differential itself like another axle, and the central differential between the first and second axle. Just like the real Arocs.
6L engine. Now the truck has some parts missing, but after 2 years I have needed some of them to other proyects.
Here you can see the complete steering linkage system. The little linear actuator move the steering of both axles.
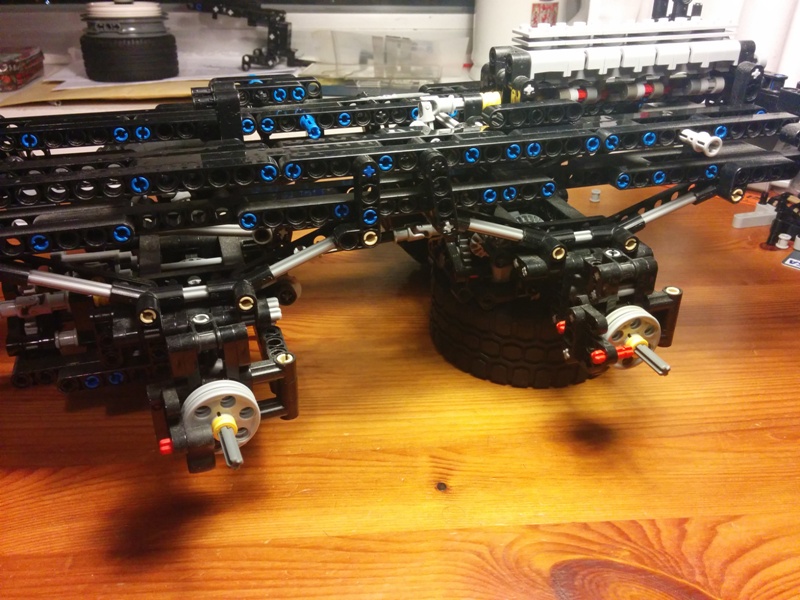
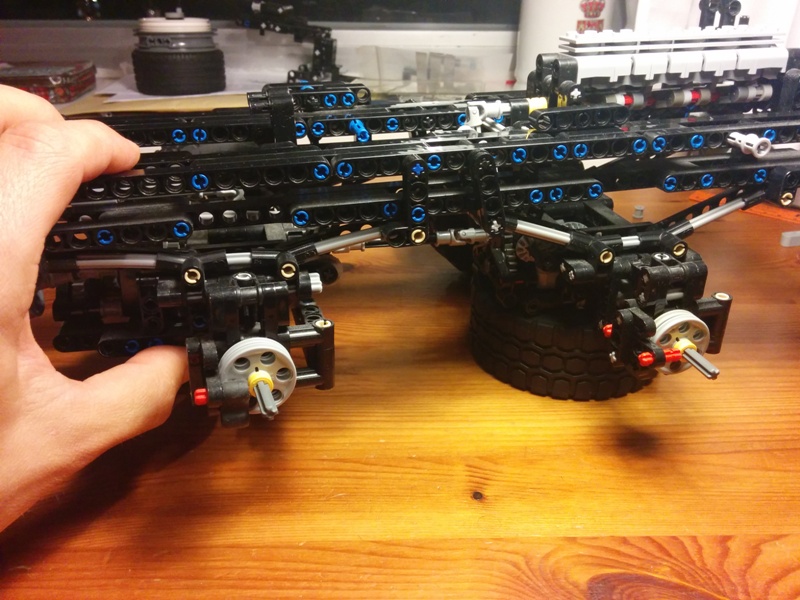
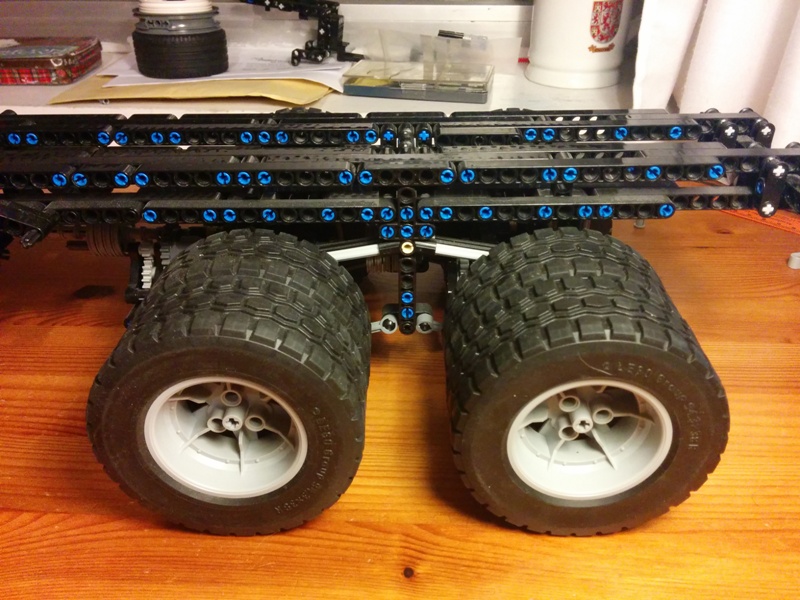
Rear axles
Again they have the same design as the real Arocs rear axles.
The third axle includes two differentials similar to the second one: the third axle differential itself and the central-rear differential.
The axles have 3-link suspension, again like the real Arocs, common leaf springs and drum brakes.
The complete assembly, including the main central differential with lock.
I am publishing this because probably I will never finish this truck, and now with so many people talking about the MB Arocs I think it is a good moment to show it. ;)
After many years following the same principle and rules in my cars, there is something important I will change starting with my next big car: from now to the future I will change the the scale ratio of my MOCs, from average 1/8 scale to 1/10, changing the "standar" 81.6x36 wheels to the 68.8x36 or 62.4x20.
The reasons for this change are very important.
- My cars are too big to be really playables, the Lego motors are very small, and the scale 1/8 is out of the useful size range. - Using 1/10 scale instead of 1/8 you only need the 50-70% of the parts to build the same car with similar mechanisms. - Less parts means less price for the people who want to built my cars. - I will need less time to build a new car.
And now the most important question for the people who like my cars: Will be my MOCs simpler now?
To be honest at the beginning probably yes, but as soon as I feel confortable with the scale I think I will can catch up a similar complexity of my previous cars.
The brakes are the main limitation in smaller scale than 1/8. The minimum wide with 68.8x38 wheels and full independent suspension is 27 studs.
If you translate 27 studs to 1/10 scale means a real car with 2.16m(85in.) wide, which it is too big.
My next car doesn't have brakes, but it includes many new functions and mechanisms, I am very sure than you will forget the brakes ;)
Now I only need build the bodywork to show it. This is the worst part for me because I don't like build bodyworks ;(
The LEGO Power Functions system has more possibilities and hidden functions than you probably think.
I will show you a few examples. Some of them are well known, but others don't.
You can use a 9V train controller to connect any Power Functions element.
To do it you only need to add an empty battery box between the controller and the IR receiver
All Power functions have a written code with numbers and letters.
The code tell you when the element was made.
In this IR receiver 02K8: that means 2nd week of 2008.
07K4: 7th week of 2014
20K3: 20th week of 2013
The PF system has a double wire connection:
- One always on for IR receivers and servos. - Second one to control motors and lights.
With the PF lithium battery you can control the speed of the second one, keeping the other one always on.
Using this double function you can do two things at the same time using the same battery.
I used this function for my Porsche 911 4 years ago ;)
This looks complex, but it has an important benefit: IR receivers are very delicate under heavy stress, and with this mechanism you protect them.
The PF Switch (pole reverser) has many possibilities.
You can use it like a extension wire or as a motor controller.
And using the same double wire system as the previous tip, you can control a motor using the same wire.
All LEGO 9v and PF motors are actually a 12v motors.
LEGO use them to avoid you break them under heavy stress.
So you can use it as hard as you want, it is almost impossible you break any of them. I have never broken a LEGO motor and I use them very hardly.
The PF Train Remote controller is usefull to control the speed of a motor.
But there are two ways to stop a motor started by train controller. You can use the red botton of the train controller, or you can use a starndar PF IR controller.
You can connect tons of motors to the same battery box.
But only if they are not under load. If you load one of them the battery power protection will cut the energy.
A Lithium battery can handle up to more or less 12XL motors, a AA battery box some more...
You can connect a IR receiver to a IR receiver, and both will work perfectly.
Using again the double wire system. You still will have 4 free PF outputs.
I used this in my Beetle
If you connect a PF motor and a PF servo to the same IR receiver output, both start at the same time. But the servo will not stops until the motor are stopped.
This happens because even if the motor is turned off, if it is still runnig it works as a generator creating a signal that keep the servo working.
Some M motors don't work properly with some V1 receivers
I have at least 3 M motors from different years with the same problem in combination with receivers V1. Theses motors have the same problem since they were new.
If I connect these motors directly to a V1 receiver they don't work, but they do it if I place a extension wire between them!!
That is very strange, the problem is related with the electric contacts.
Of course if I connect the motors to the V2 receiver they works fine.
Inside the file you can find: - The part list in .bsx format, to be open with brickstore sofware - Brickstore software(compatible with Windows and MAC) - The part list in XML formal(.TXT), compatible with bricklink.com - The part list in image format(8 pages) - The part list in images for the different parts of the car: chassis, gearbox, bodywork and controller.
Inside the file you can find: - The part list in .bsx format, to be open with brickstore sofware - Brickstore software(compatible with Windows and MAC) - The part list in XML formal(.TXT), compatible with bricklink.com - The part list in image format(8 pages) - The part list in images for the different parts of the car: chassis, gearbox, bodywork.
The price is 15€
Special option for Beetle buyers!!
If you already have the VW Beetle instructions in any version(if not too, but its your choice...), now you can buy only the T1 Bus bodywork in low price and use the Beetle's chassis!!
The T1 Bodywork instructions have 408 pages, and 76MB
Inside the file you can find: - The part list in .bsx format, to be open with brickstore sofware - Brickstore software(compatible with Windows and MAC) - The part list in image format(5 pages)
The price is only 10€
Please, before purchase the instructions read this!
- If you buy the instructions, YOU ARE NOT ALLOWED TO: * RESALE IT * SHARE WITH ANYBODY * MAKE ANY TYPE OF BUSINESS WITH ITS INTELLECTUAL PROPERTY, Like sell the car built, or rent the car to other people.
- The price is in euros(€). But if your currecy is different don't worry: paypal do the exchange directly to euros from your local currency($, £, ¥...) for you. Also under special request I can accept a different way to pay the instructions.
- If you don't receive your instructions after 48 hours of the payment, please check your spam folder, and if the email is not there please send me an email to: info @ sheepo.es. I always send the instrutions quickly(usually within 24 hours), but sometimes the email never arrives to the destiny.(internet errors, spam filters, etc)
- The instructions will be send(actually a link to download it) to the payment email adress. If you want, I'll send you the instructions to a different email adress, please leave a comment in the paypal payment.
- For MAC users: mac can't open zip files with password, to open the instructions you will need an extra software (you will can find a lot of free software in internet to do it).
- Build this car is very hard, if you have never built a Lego Technic set, I recommend you to do it first. Doing that is not necessary but it will help you later when you built it
Also you must think that the pieces are not perfect, so the gearbox are not 100% reliable, it should make good around the 90% of the speed changes
- What happens if I lose my instructions copy(hard drive failure or virus)? -> I have a data base with all costumers of my instructions, if you lose it you can email me and will send it to you again free.
- There is any Lego Technic set which I can buy to reduce the parts cost? -> No, The only sets with some parts in common with this MOC are 42000 and 8070.
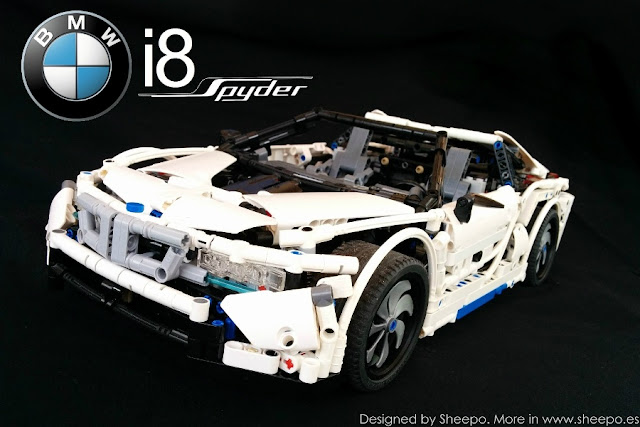
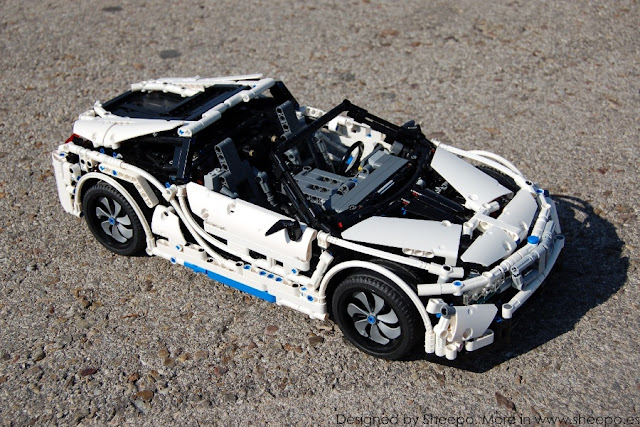
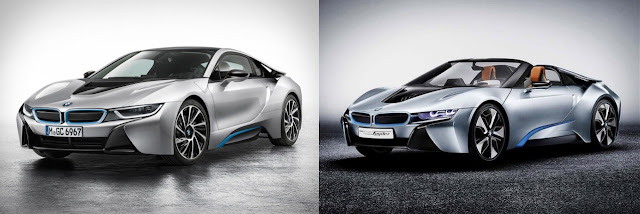
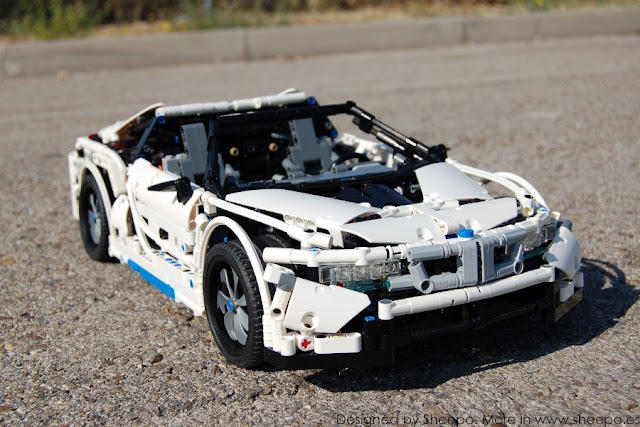
Note: I know this version of the i8 doesn't exist. This MOC is a mix between comercial i8 and i8 Concept Spyder.
This is my first complex car in scale 1/10.
The overall size is 58x25x16 studs (46x20x13 cm).
It is powered by 5 PF motors and one servo motor, 2 IR receivers and 2 pair of lights.
The only weighs 1.9Kg.
Front and rear lights.
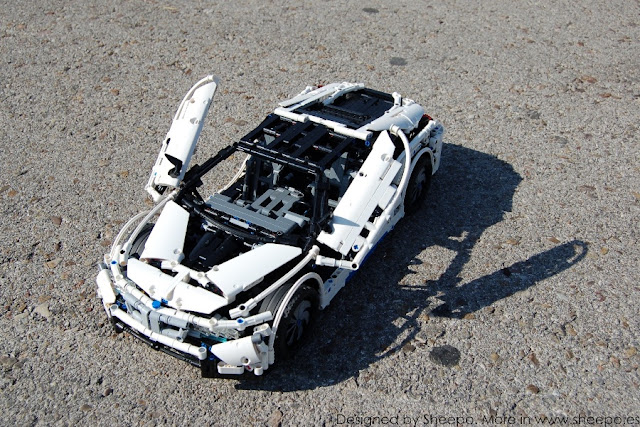
As the Spyder version it has folding roof. In the Concept Spyder, BMW never showed the folding roof mechanism, so I have designed my own mechanism and the way to hide the roof under the engine cover.
Openable doors from the controller. Only one M motor control both doors. Each turning motor direction connect to one door.
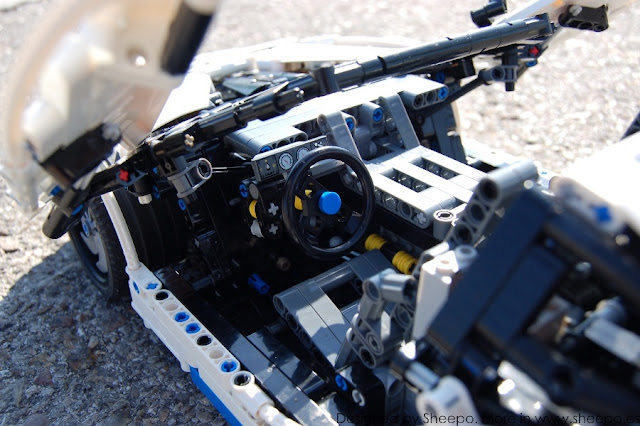
Of course it has steering with working steering wheel and a complete interior with full size seats..
Hibrid drive system. Here the most important part of the car(at least for me).
Like the real i8, this MOC is driven by Hidrid Drive System. Two different drivetrains working together to get the best available performance.
The front axle's drivetrain is powered by XL motor and has 2-speed gearbox(3:1 and 1:1 ratios).
The rear drivetrain is powered by 2L motors, and include a servo motor to change the drive mode.
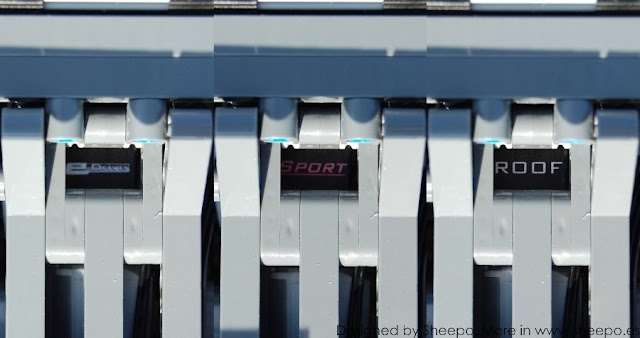
It can work under two different drive modes that you can change instantly from the controller: eDrive and Sport.
eDrive mode The car works as a normal front wheel drive car. The real axle car turn free and the front gearbox is un low gear.
The max speed is around 1.5Kph.
Sport mode
When you connect the Sport mode the 2L motors star runing, and the servomotor connect the rear axle to the L motors and at the same time change the speed of the front gearbox. So now the car is AWD with a long gear ratio.
The rear transmision has only one speed, and the ratio is the same as athe front axle in high speed ratio.
The max speed is around 4Kph.
Also the servo motor connect the folding roof. Powered too by the same 2L motors of the rear drivetrain.
Drive mode indicator in the interior.
3L fake engine working with the rear divetrain L motors. So it only works with Sport mode.
Leaving the eDrive mode as a "100% electric mode".
Battery compartment on the rear axle.
The most wanted picture.
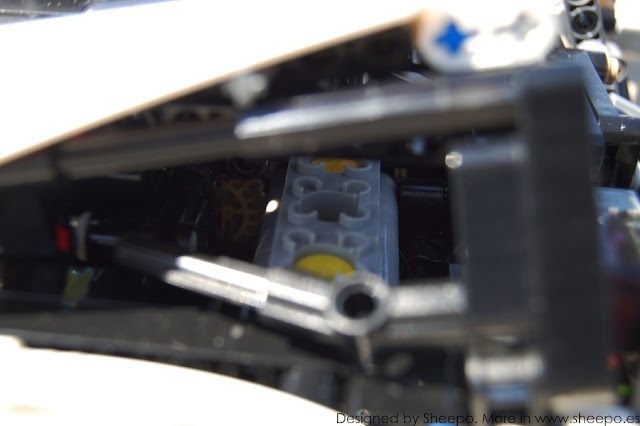
Front axle with double wishbone suspension and double steering arn to improuve the performance
Rear multilink suspension. Suspension formed by 5 links: two upper links, two button links and a control link.
The bodywork is easy to dissasemble. You only need to remove about 15 pins to remove the bodywork in a few big parts.
New special controller to help you to control easily the hidrid drive system.
Finally as always a complete video showing all its functions in detail
I want to show you some more bodyworks compatible with my modular platform.
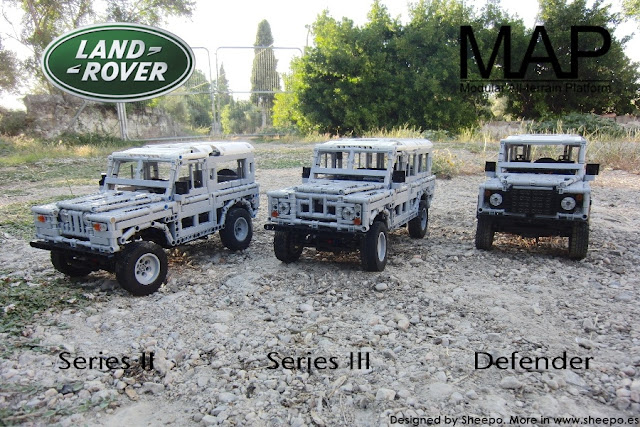
This time I have chosen again the Land-Rover family. The reason is because many people like the LR, but my previous one is very big and complex. Also, I wrote before the MAP born as a mid-size Defender, so built some Land-Rovers was a important too.
LR Series II, III and Defender are very similar, so was very easy create all of them.
All bodyworks are compatible 100% with all MAP chassis. The short versions in WB:24, and the long ones in WB:28.
The roof is easy removable to get a convertible LR.
Series II
You can place the spare wheel in the rear door or in the front bonnet.
To show you the Series II, I have only built the 88" version, but there are available: 88, 109 3door and 109 5door version.
Series III
Like the Seris II, you can place the spare wheel in the rear door or in the front bonnet.
To show you the Series III, I have only built the 109" 5door version, but there are available: 88, 109 3door and 109 5door version.
Defender
To show you the Defender, I have only built the 110 3door version, but there are available: 90, 110 3door and 110 5door version.
As always a little video:
The instructions are now available
In total there are available 9 LR bodyworks. The cost of all os them is the same: 5€ each one.
And remember: if you already have any MAP chassis you can use it with these bodyworks!!!
To buy the instructions go to the button of this page
The last 3 years I attended the LEGO Fan Weekend in Skaerbaek, but this year I want to know a different event, so this year I will attend the the LEGO World Utrecht in the Nederlands in October
I will be there in October 25th, 26th and 27th
I will show there some of my MOCs:
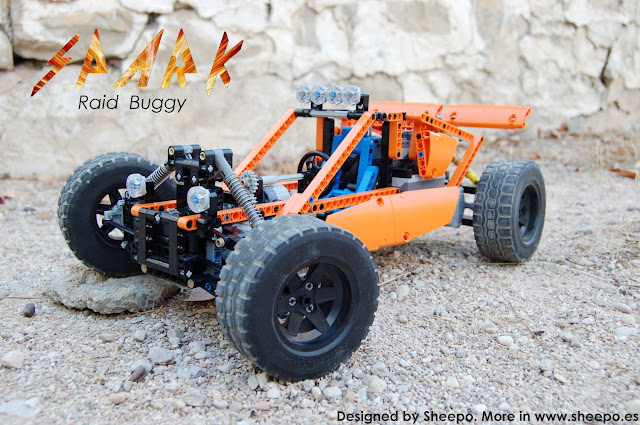
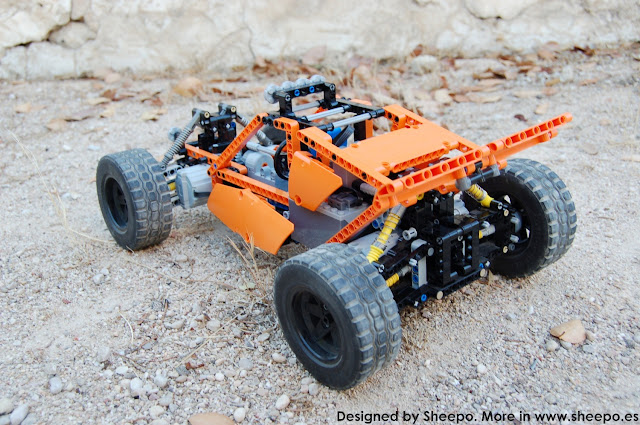
- BMW i8 - Kamov KA-32 - 3x MAP Land-Rovers and Jeep Willys - Mustang GT500 - NEW Big RC Buggy with SBrick
And as all always I attend an international event I will show there a completly new complex MOC!!
Also with some luck I will show one more new MOC very special.
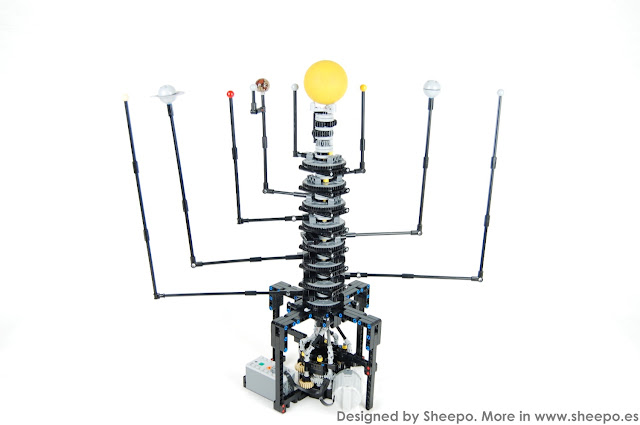
We are only a very small living beings in a huge universe. We live in a small planet called Earth in a group of 8 planets called Solar System, with our star in the center, the Sun.
Note: nowadays Pluto is not considered a planet.
All planets turn around the Sun at their specific period. In this LEGO version the relative orbital period accuracy between planets is over 98%.
It is powered by a PF XL motor and a PF Lithium battery.
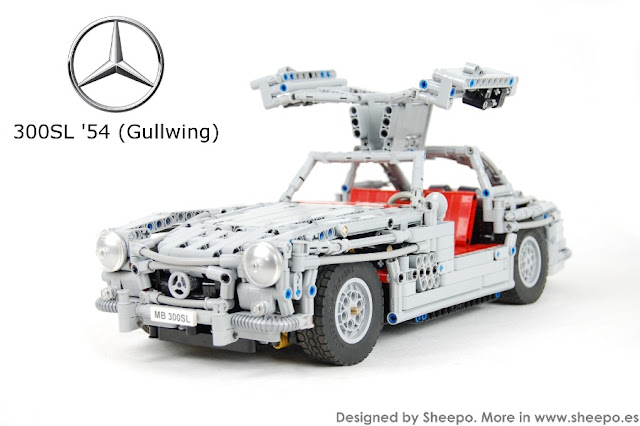
I am here with my lastest car. I showed it in the LEGO World Utrecht 2015.
It is one of the most famous sports car in history, and the fastest production car on its time, the legendary Mercedes-Benz 300SL, usually called "Gullwing".
It is built in scale 1/10.5. With a final size of 21x13x53 studs(17x10x42 cm).
The weght is 1.5Kgs, and has around 1500 parts
It is powered by 4 PF motors, 2 IR receivers and one PF lithium battery / AAA battery.
To get better soft curves I have used light grey pneumatic tube. But all of them have standar soft axle lengths: 7, 11, 12, 14, 16 and 19 studs, so you can use soft axles if you want.
The gullwing doors have lock. you need to push the little black part in the door to open it.
It has steering with working steering wheel (PF M motor).
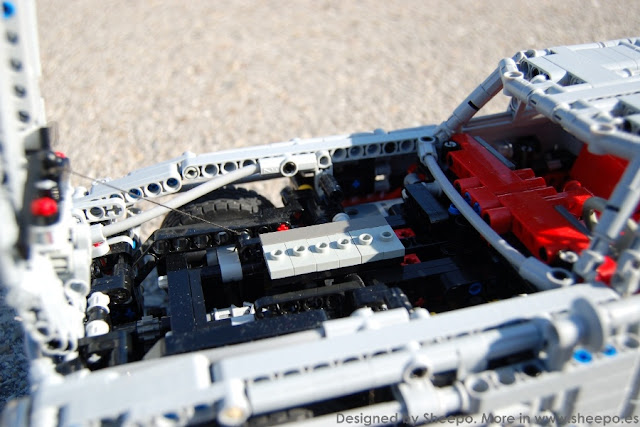
Openable bonnet and trunk.
Unfortunately there are not enough space under the bonnet to add a 6L fake engine, so this time is a only a few plates to show where it must be.
The car is drive by a single PF XL motor, and the max speed is around 3kph(1.9mph).
In the rear trunk is the battery.
Realistic suspension in both axles: double wishbone in the front and swing axle in the rear.
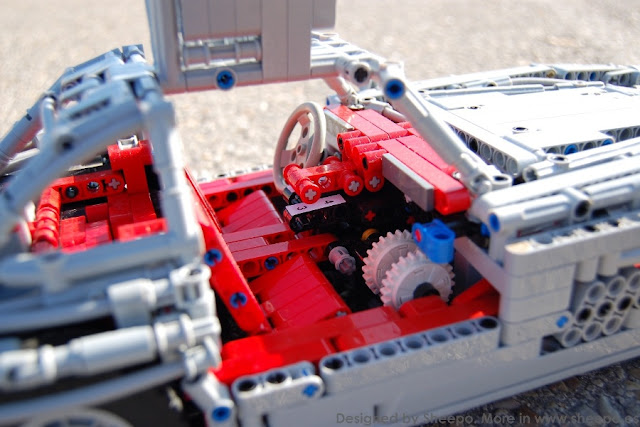
Small size car doesn't mean poor functions, here the first proof: 4 speeds sequential gearbox.
In this car I release a whole new gearbox, 4th gen. It is very small and very very reliavable. In this car it doesn't include auto-stop function for gearbox motor (PF M motor), so you must stop the motor by yourself.
Of course it include speed indicator from the interior of the car.
And the second proof: drum brakes in all wheels.
Yes, brakes like my other big cars. In this time to save some space I have used the interior side of the rim like the drum. Powered by a M motor.
Quick bodywork disassemble. You only nned to remove 2 pins ans 2 small liftarms and the bodywork can be removed in one piece.
"Most wanted" picture.
Finally a picture to show you the real size difference between this 1/10.5 scale car and one of my previous 1/8 cars.
Inside the file you can find: - The part list in .bsx format, to be open with brickstore sofware - Brickstore software(compatible with Windows and MAC) - The part list in image format(7 pages) - The part list in images for the different parts of the car: chassis, bodywork and controller.
The price is 15€
Please, before purchase the instructions read this!
- If you buy the instructions, YOU ARE NOT ALLOWED TO: * RESALE IT * SHARE WITH ANYBODY * MAKE ANY TYPE OF BUSINESS WITH ITS INTELLECTUAL PROPERTY, Like sell the car built, or rent the car to other people.
- The price is in euros(€). But if your currecy is different don't worry: paypal do the exchange directly to euros from your local currency($, £, ¥...) for you. Also under special request I can accept a different way to pay the instructions.
- If you don't receive your instructions after 48 hours of the payment, please check your spam folder, and if the email is not there please send me an email to: info @ sheepo.es. I always send the instructions quickly(usually within 24 hours), but sometimes the email never arrives to the destiny.(internet errors, spam filters, etc)
- The instructions will be send(actually a link to download it) to the payment email adress. If you want, I'll send you the instructions to a different email adress, please leave a comment in the paypal payment.
- For MAC users: mac can't open zip files with password, to open the instructions you will need an extra software (you will can find a lot of free software in internet to do it).
- Build this car is very hard, if you have never built a Lego Technic set, I recommend you to do it first. Doing that is not necessary but it will help you later when you built it
Also you must think that the pieces are not perfect, so the gearbox are not 100% reliable, it should make good around the 90% of the speed changes
- What happens if I lose my instructions copy(hard drive failure or virus)? -> I have a data base with all costumers of my instructions, if you lose it you can email me and will send it to you again free.
I have been using SR3D Builder to create my digital models after finish my real models from more than 5 years.
I use it because in my opinion it is the best software to create technic models. You can do more things and it has more parts than LDD, and it is easier, more intuitive and quicker to build than MLCad.
Also its 3D models files are compatible with all LDraw tools(MLCad, LDview, etc).
But unfortunately, Sergio Reano, the creator of this awesome program passed away in October 2014.
But today is not possible download the progran fron its official site(HERE).
Quick guide about how to install lastest SR3D in your PC (Windows 7 o newer)
I have uploaded the lastest free available version(0.9.7.81), you can download it HERE.
SR3D uses a very particular software and windows functions to run in and it is hard to get it running correctly.
Usually when try to install SR3D in your PC the installation finish correctly without any advise.
But when you try to execute the program and error message window appears and you can't use it.
I bought a new PC a few months ago and I spend more than 6 hours to find a solution to get the SR3D work properly. I downloaded the newest drivers for all PC devices, newest DirectX, all Windows updates, trying with older SR3D versions, anything you can imagine and nothing worked.
But finally I found a very easy solution for this problem. Actually I don't know why it works, but it does.
This solution worked for in two differents PC, so I hope it work for you too if you can't get the SR3D run correctly.
1 - Uninstall any version of SR3D and LDraw you have in your PC.
2 - Download the lastest version of LDraw All-in-One which included SR3D Builder, it was the 2013_1_v1 version. You can download it HERE
3 - Instant LDraw software tools including at least MLCad, LDraw and SR3D Builder (0.8.9.16 version), I recomend install all tools because they need just a few MB in your HDD.
4 - When the LDraw installation end open SR3D, and finish the instalation (rebuild part list).
5 - When SR3D finish it must work properly with all its functions, but it is not in the lastest version. Then you can keep in that version if you want, or upgrade it.
6 - To upgrade it just close SR3D and install the lastest version (0.9.7.81) normaly. When the instalation finish it should work properly.
Now if you want you can upgrade LDraw if you want to any version you wish.
- The part list in .bsx format, to be open with brickstore sofware - Brickstore software(compatible with Windows and MAC)
Please, before purchase the instructions read this!
- If you buy the instructions, YOU ARE NOT ALLOWED TO: * RESALE IT * SHARE WITH ANYBODY * MAKE ANY TYPE OF BUSINESS WITH ITS INTELLECTUAL PROPERTY, Like sell the car built, or rent the car to other people.
- The price is in euros(€). But if your currecy is different don't worry: paypal do the exchange directly to euros from your local currency($, £, ¥...) for you. Also under special request I can accept a different way to pay the instructions.
- If you don't receive your instructions after 48 hours of the payment, please check your spam folder, and if the email is not there please send me an email to: info @ sheepo.es. I always send the instructions quickly(usually within 24 hours), but sometimes the email never arrives to the destiny.(internet errors, spam filters, etc)
- The instructions will be send(actually a link to download it) to the payment email adress. If you want, I'll send you the instructions to a different email adress, please leave a comment in the paypal payment.
- For MAC users: mac can't open zip files with password, to open the instructions you will need an extra software (you will can find a lot of free software in internet to do it).
- Build this car is very hard, if you have never built a Lego Technic set, I recommend you to do it first. Doing that is not necessary but it will help you later when you built it.
- The instructions has been tested by a Lego Technic expert builders, if you can't built the car and you think the instructions are wrong, please check your built twice before ask me. Also you must think that the pieces are not perfect, so the gearbox are not 100% reliable, it should make good around the 90% of the speed changes.
- What is the best site to buy the parts? -> www.bricklink.com
- What happens if I lose my instructions copy(hard drive failure or virus)? -> I have a data base with all costumers of my instructions, if you lose it you can email me and will send it to you again free.
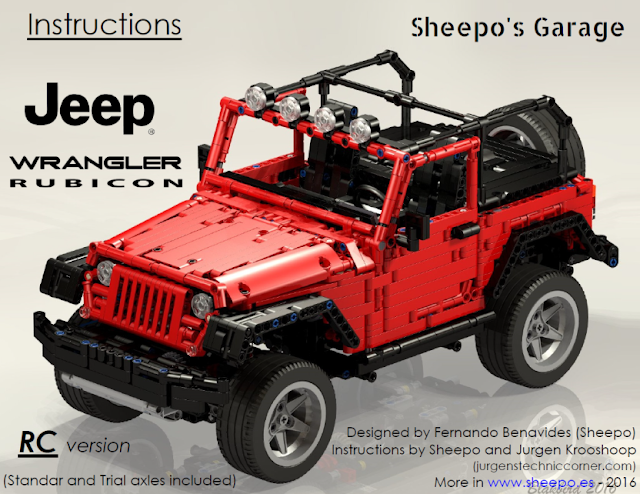
It is built in scale 1/10. With an overall size of 23x52x25 studs(18x42x20 cm).
It weights 2.7Kgs, and has around 2700 parts
It is powered by 5 PF motors, 2 IR receivers and one PF AA battery.
- 2XL motors for drive
- M motor for steering
- M motor for sequential gearbox
- M motor for drive mode and range gearbox
Fully openable doors with bonnet and trunk.
The rear spare wheel is connected to the battery, so to turn ON/OFF the battery you only need to turn slightly the wheel one or other side.
V6 fake engine and complete interior with working stering wheel.
As usual 5+R speeds sequential gearbox (4th GEN).
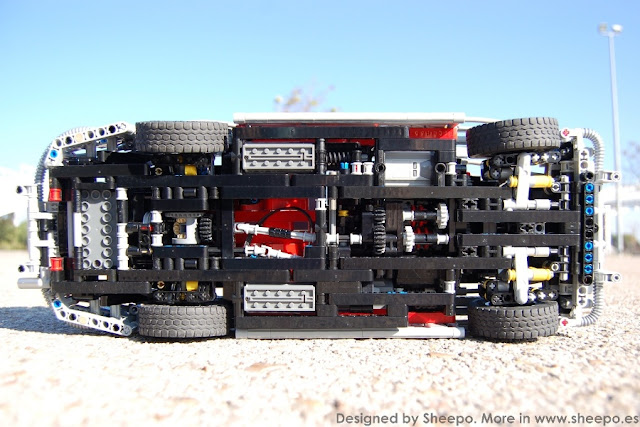
2-speeds range gearbox and 2WD/4WD modes. Also its has an important feature of the Rubicons versions: lockeable front and rear differenfials.
Realistic drive modes, you can select sequentialy between 4 drive modes: 2H, 4H, 4L and 4L with lock diff.
I know many people like the Wrangler looks more extreme, for them I have built a second pair of axles. They include portal hubs and an extra 3:1 gear reduction.
They also add 2 studs high and 2 studs wide of each side
Important note: even with trial axles this car is not a Trial Truck, you can not expect Trial Truck off-road capabilities...
Also this time I release at the same time the Manual version. It has the same functions of the RC version, including 5+R speeds manual gearbox(instead of sequential), 2 speeds range gearbox, 2WD/4WD modes and lockeable differentials.
I have designed this model exclusive for a customer as a special order with specific features and design. It is not for sale and I will not publish instructions to build it.
This car is a Chevrolet Impala 4 doors '67, and it is one of the main character of the TV series Supernatural.
It is built in 1/10 scale. The result is a 70x27x19 studs (56x22x15cm) car of American muscle.
It has 3337 parts and weighs around 3kgs.
It is powered by:
1 PF AA battery box 2 IR receivers 2 M motors 2 XL motors 1 Servo motor
Complete tan color interior with full size seats, door panels and dashboard. It also has a door in the roof to look easily in the interior.
All doors have door look.
Front bonnet spring loaded and fake V8 working engine. Also you can open the bonnet with a lever located in the interior of the car close to the steering wheel.
Steering with working steering wheel (M motor).
Rear openable trunk with hidden box(M motor).
Front double wishbone suspension and rear live axle.
2-speed semiautomatic gearbox. 2XL motors for drive and one servo for change speeds.
Gear ratios: 1st: 1:1 2nd: 1:3
Finally a detailed video of the car with all functions.
If you are interested in order an exclusive car or any other Technic machine you can write me to info@sheepo.es
This year I will arrive with two new MOCs: - A highly modified version of one of my previous cars - A completely new MOC: it is not a car or related with cars...